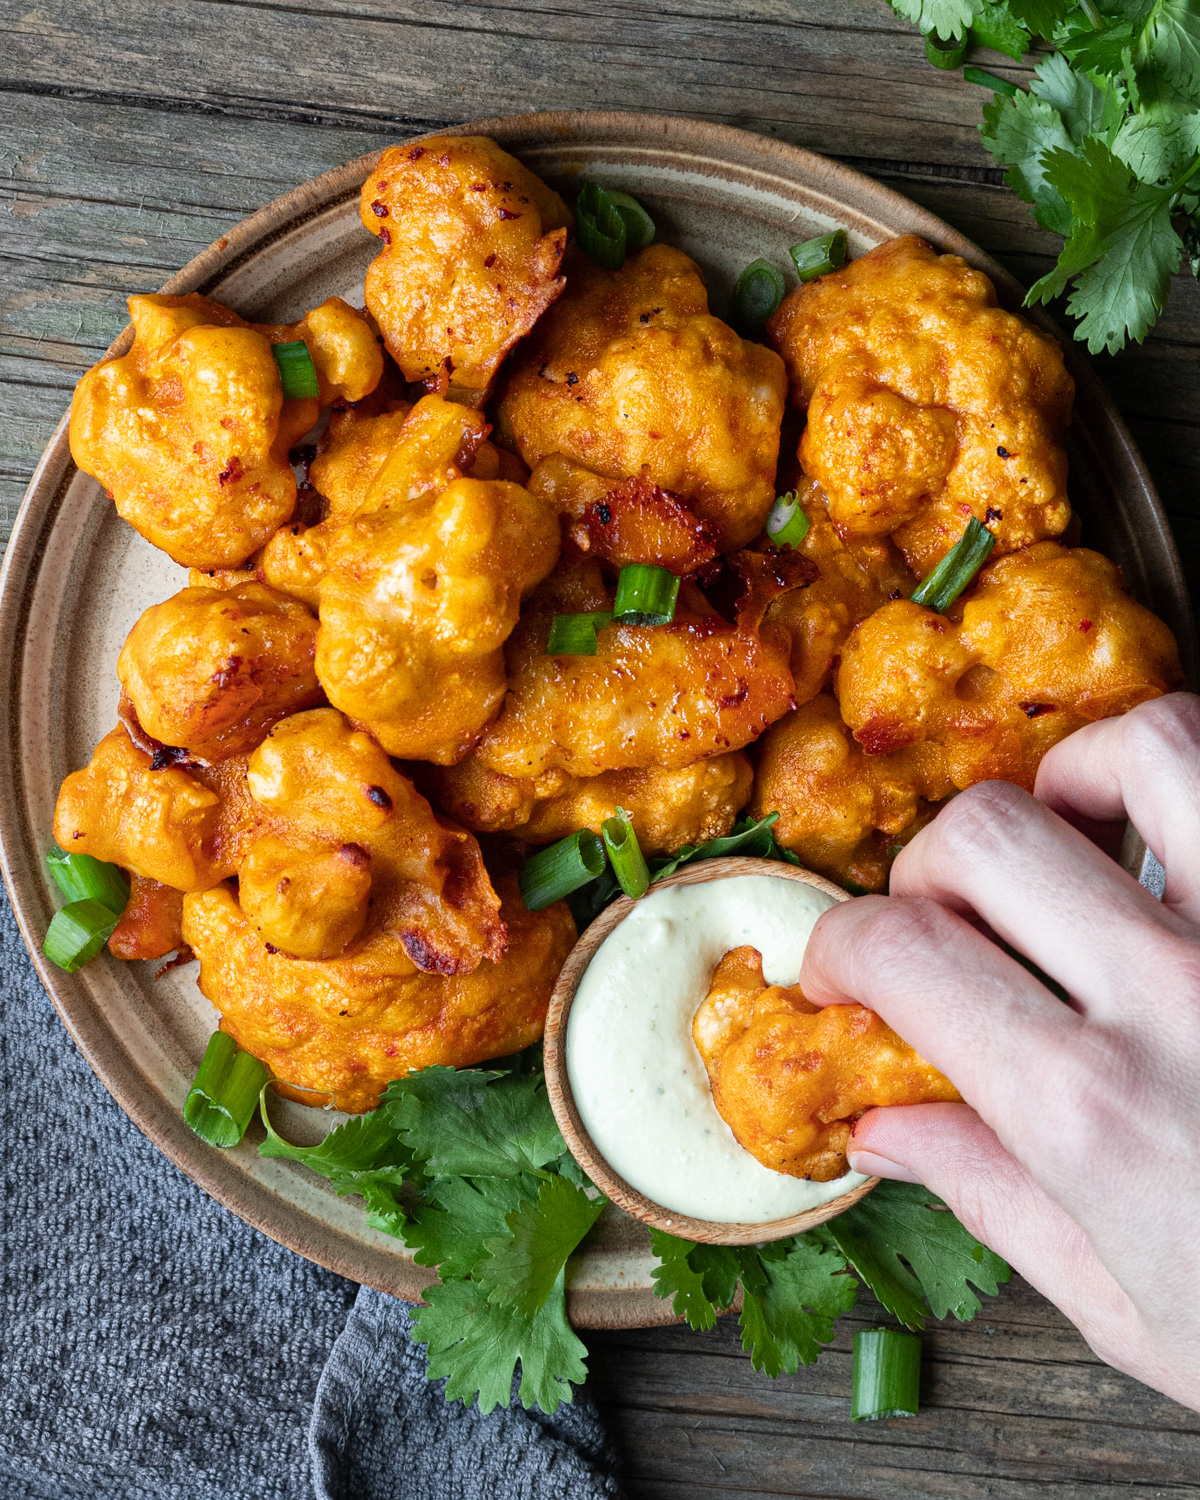
Gluten-free cauliflower wings that are actually crispy and saucy? Yes, please! With two bold flavors—spicy buffalo and tangy salt & vinegar—there’s something for everyone. A soda water batter makes them extra light and crispy, while nutritional yeast adds a rich, savory boost. Easy to bake or air fry and made for sharing!

This post may contain affiliate links. The content provided is for informational purposes only and is not intended to serve as medical advice. For more details, please refer to our disclaimer page.
✋🏼E aí, pessoal! Hey there, friends!
Let’s talk about crispy, saucy, and seriously flavorful gluten-free cauliflower wings. Whether you’re here for the classic heat of buffalo sauce or the bold tang of salt & vinegar, this recipe delivers—thanks to a bubbly soda water batter for crunch and nutritional yeast for a deep, savory boost. No deep fryer, no fuss—just simple pantry staples, a hot oven (or air fryer), and about 30 minutes.
As a mom, I learned early on that one meal needs to work for everyone—I don’t have time to cook separate dishes, and I need a recipe that delivers every time, no fails. So I tested and tweaked until I found the perfect crispy coating that actually sticks—without gluten, eggs, or dairy. No more fussy batters that fall off or cauliflower wings that turn out soggy. And because not everyone loves spice, this recipe offers two bold flavors, so everyone gets exactly what they want.
Want more gluten-free appetizers? Try our crispy air fryer yuca fries or my kids favorite zucchini sweet potato fritters next!
😍Why You Will Love These Wings
- Crispy Without Frying: Baked or air-fried, they’re crispy outside, tender inside.
- Better Ingredients, Bigger Flavor – Nutritional yeast adds a deep umami kick, and soda water creates a light, crunchy texture.
- Two Bold Flavors & Perfect for Sharing: Spicy buffalo or tangy salt & vinegar! This is a crowd-pleaser for parties, game nights, or family dinners.
- Perfect for Kids: One base, two flavors! The buffalo sauce brings the heat, while salt & vinegar keeps it mild—so everyone at the table is happy.

🛒Ingredients and Flavor Notes
Gluten-free cauliflower wings are all about bold flavors and crispy texture, and every ingredient plays a role in making that happen. Here’s what we’re using for these vegan wings and why:
👉 Want to skip ahead? Jump to the Recipe

- Cauliflower Florets: Make sure to cut your florets into even-sized cauliflower pieces. This ensures they cook evenly and crisp up perfectly, whether baked or air-fried. Cut along the stem so the florets hold their shape.
- Brown Rice Flour: This keeps the batter light and crispy while giving the wings structure so they don’t fall apart. You can substitute it with white rice flour, but it won't be as crispy. no
- Tapioca Flour: Helps the batter stick to the cauliflower and gives the coating that extra crunch. It also prevents the wings from turning out dry after baking.
- Nutritional Yeast: Helps to add a crispy texture and a subtle cheesy, umami flavor to enhance the depth of the batter.
- Milk (Dairy or Non-Dairy): I prefer to use dairy-free milk over water to help the batter stick better and create a smoother, more even coating (especially as we don't add eggs). Use unsweetened almond milk, oat milk, or soy milk.
- Sparkling Water/Soda Water: Lightens the batter and creates a crispier texture. Use right before baking to keep the carbonation intact.
- Garlic Powder and Salt: Adds depth of flavor and a savory kick to the batter. Since the base is simple, this ensures the wings have a great taste before adding the sauce.
Spicy Buffalo Sauce (Vegan):
- Butter (Dairy Or Non-Dairy): A key ingredient for that classic buffalo sauce richness. I use room-temperature regular or vegan butter so it blends smoothly into the sauce.
- Franks Hot Sauce: If you prefer more traditional heat, go with Frank’s Red Hot. But I like to use sriracha for a slightly garlicky, deeper spice! Frank’s RedHot Original and Huy Fong Sriracha are generally gluten-free, but always check labels.
- Gluten-Free Soy Sauce: Adds umami and depth to balance the heat. Always check the label to ensure it’s certified gluten-free, as many brands contain wheat.
- Brown Sugar: Just a touch to help balance out the flavors. Swap with honey.
- Lime: I add a touch of fresh lime juice to help bring some balance to the added sugar.
Salt and Vinegar Sauce:
- White Vinegar: Gives the wings that bold, tangy flavor, similar to salt & vinegar chips. You want plain white vinegar for the cleanest taste, but apple cider also works.
- Italian Seasoning: Helps to season the sauce. You can also substitute with oregano.
- Lime Juice: Helps tone down the strong vinegar taste.
- Salt: A simple but essential ingredient. If the salt sinks to the bottom, just sprinkle some over the wings after dipping for even coverage.
📌 Find the full ingredient amounts in the recipe card below!
⚠️ Celiac Safety Tip: Always check that your gluten-free flour, hot sauce, soy sauce, and spices are certified gluten-free to avoid cross-contamination. Many brands process these alongside wheat products. I use Kikkoman gluten-free soy sauce for this recipe.
🔁Substitutions & Variations
- Rice Flour Substitute: If you don’t have brown rice flour, swap it for white rice flour and increase the tapioca starch to ¾ cup for better binding and crispiness. Corn flour also works as a 1:1 substitute, giving a slightly lighter, crispier texture.
- Gluten-Free Flour Swap: If you don’t have brown rice flour and tapioca starch on hand, you can use a gluten-free all-purpose flour blend like Bob’s Red Mill Gluten-Free AP Flour. Just make sure it doesn’t contain xanthan gum, as gums can make the batter too thick.
- Grain-Free Alternative: For a grain-free option, chickpea flour works well but creates a denser, heartier coating. You may need to add an extra tablespoon of water to loosen the batter slightly.
- Soy-Free Option: Replace gluten-free soy sauce with coconut aminos for a similar umami depth
- Oven vs. Air Fryer: For crispy baked buffalo cauliflower wings, bake at 450°F (230°C) and broil for the last minute. For extra crunch, air fry at 400°F (200°C) for 12–15 minutes, flipping halfway.
👩🏽🍳Step-By-Step: Making Vegan Wings
Step 1: Preheat and Prep
Preheat your oven to 450°F (230°C). Line a baking pan with parchment paper and lightly oil it to prevent sticking. Cut your cauliflower into small, even florets, following the natural stem to keep them from falling apart. Ensure they are dry and not wet.
📌 Tip: Smaller florets cook faster and get crispier, so aim for bite-sized pieces!
Step 2: Make the Batter
In a large bowl, whisk together the batter ingredients until smooth. The batter should be thick but pourable—like a thin pancake batter. Add the cauliflower florets to the bowl and gently toss until they’re evenly coated. You can use a large spoon or your hands for this step.
📌 Tip: Shake off excess batter before placing them on the pan—too much batter can make them soggy instead of crispy!

Step 3: Bake the Cauliflower
Place the battered coated cauliflower on the prepared baking pan and cut side down for better browning. Bake for 15 minutes until they start to crisp up.
Step 4: Prepare The Sauces
While the cauliflower bakes, prepare your sauces:
- Buffalo Sauce: Mix the ingredients for the buffalo sauce until smooth in a medium bowl. Make sure to melt the butter first to ensure that it is even mixed.
- Salt & Vinegar Sauce: Mix the salt and vinegar ingredients in another bowl. If the salt settles at the bottom of the vinegar, just sprinkle some extra salt over the wings after dipping!

Step 5: Coat Buffalo Wings
Remove the par-baked cauliflower from the oven. Using tongs, toss half of the wings in the buffalo sauce, ensuring they’re evenly coated. Shake off any excess and place them back on the pan. Bake for another 5–8 minutes until golden brown. For an extra crispy finish, broil for 1 minute, keeping a close eye to prevent burning.
📌 Tip: Air frying? Set to 400°F (200°C) and cook for 12–15 minutes, flipping halfway.

Step 6: Toss and Serve
Remove the wings from the oven. Toss the remaining unsauced cauliflower wings in the salt and vinegar sauce, ensuring even coating. Then, re-coat the buffalo wings with any remaining buffalo sauce for extra flavor.
Arrange both flavors on a serving plate and pair them with your favorite dipping sauces (see below for recommendations). Serve immediately and enjoy!

💡 How to Get Crispy Texture
- Cut Even Florets: Smaller, even-sized pieces cook faster and crisp up better. Too big, and they’ll stay soft inside.
- Use Dairy-Free Milk Instead of Water: It helps the batter cling better to the cauliflower, preventing the coating from sliding off.
- Let the Batter Rest: Gluten-free flours absorb liquid differently. Letting the batter sit for 5–10 minutes helps it thicken properly and ensures the coating sticks better.
- Coat Evenly, But Don’t Overdo It: Too much batter makes the wings soggy. Shake off the excess before baking for the crispiest texture.
- Broil for Extra Crispiness: If baking, broil for the last minute to get a golden, crispy finish. Just watch closely to avoid burning!
🍲Best Dipping Sauces
A great dipping sauce makes these gluten-free cauliflower wings even better! For your buffalo cauliflower bites pick something cool, creamy, or smoky. For Salt & Vinegar Wings, fresh, tangy, or nutty dips work best:
- Smoky Eggplant Babaganoush: A rich, roasted dip that balances out the spice.
- Vegan Ranch Dressing: The classic creamy dip for vegan wings.
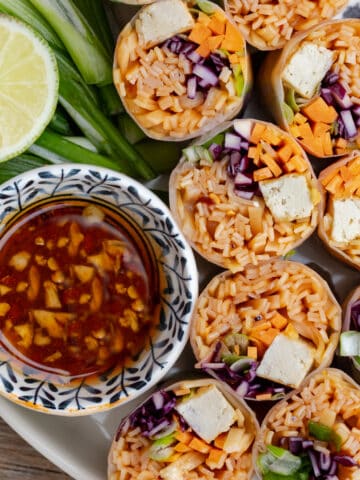
- Chili Lime Sauce: A bright, citrusy contrast to the crispy baked buffalo cauliflower wings (from my spicy noodle spring rolls recipe).
- Spicy Thai Peanut Sauce: A bold, nutty flavor that pairs perfectly with the vegan buffalo wings (from my avocado spring rolls recipe).

🥡How To Store & Reheat
To keep your gluten-free cauliflower wings fresh and crispy, here’s how to store them properly:
- Refrigeration: Store leftover vegan wings in an airtight container in the fridge for up to 2 days. They will soften over time but can be reheated to restore some crispiness.
- Reheating for Best Texture:
- Oven: Bake at 400°F (200°C) for 5–7 minutes until warmed through and slightly crispy.
- Air Fryer: Heat at 375°F (190°C) for 3–5 minutes for the crispiest results.
- Avoid the Microwave: It will make the coating soft and soggy.
- Freezing (Not Recommended): These gluten-free cauliflower wings are best freshly made, as freezing can cause them to lose their crispiness.
🌱Nutrient Highlight
Cauliflower is a brain-boosting powerhouse, packed with choline for cognitive health (1) and vitamin C to protect against oxidative stress (2). It’s also an inflammation fighter, thanks to its antioxidants and phytonutrients (3), and helps support gut health—which in turn supports mental well-being(4, 5). So when you’re enjoying these gluten-free cauliflower wings, you’re not just indulging in great flavor; you’re nourishing your brain and body too!

❔Recipe FAQ
Ensuring the cauliflower is completely dry before battering is crucial. After washing, pat the florets thoroughly with a clean kitchen towel. Additionally, after coating the florets, let them rest for a few minutes on the baking sheet before baking; this helps the batter adhere better during cooking
Certainly! While the recipe calls for brown rice and tapioca flours, you can substitute with a gluten-free all-purpose flour blend. However, avoid blends containing xanthan gum, as they can make the batter too thick. Chickpea flour is another option, though it yields a denser texture.
To get crispy gluten-free, vegan wings, make sure you don't overcrowd the pan, shake off excess batter, and use high heat & broil at the end.
🌟 Loved our gluten-free cauliflower wings? Let us know! I’d be thrilled if you could leave a comment, star rating, or share this recipe. Your feedback helps support and improve AtMyTable and helps others discover new favorites. Or come chat with me on Facebook or Instagram!
🥣More Gluten-Free Sides
Looking for more delicious gluten-free sides to serve with your cauliflower wings? Here are a few favorites that will round out your meal and keep everyone coming back for more:
👋🏼Até logo, amigos! Keep savoring every bite of our vegan cauliflower wings, and don’t forget—life’s better with a little flavor and fun. Até a próxima!
📖 Recipe

Gluten-Free Cauliflower Wings (Vegan & Two Bold Flavors!)
Ingredients
For the Cauliflower Wings
- 1 large cauliflower separated into florets
- 1 ¼ cups brown rice flour
- ½ cup tapioca flour
- ¼ cup nutritional yeast
- 1 cups dairy-free milk unsweetened oat or soy
- 1 cup unflavored soda water carbinated water
- 1 tablespoon garlic powder
- ¼ teaspoon salt
Buffalo Sauce
- 4 tablespoon vegan butter room temp
- 2 tablespoon sriracha
- 1 tablespoon gluten-free soy sauce gluten free
- 2 teaspoon brown sugar
- 1 teaspoon lime juice fresh
Salt & Vinegar Sauce
- 1 cup white vinegar
- 1 tablespoon salt
- 1 teaspoon italian seasoning
- 1 teaspoon lime fresh
Instructions
- Preheat oven to 450°F (230°C). Line a baking pan with parchment paper and lightly oil it. Cut the cauliflower into small florets (bite-sized pieces work best).1 large cauliflower
- Make the batter: In a large bowl, mix the batter ingredients together until smooth. The batter should be thick but pourable. Like a thin pancake batter1 ¼ cups brown rice flour, ½ cup tapioca flour, ¼ cup nutritional yeast, 1 cups dairy-free milk, 1 tablespoon garlic powder, ¼ teaspoon salt, 1 cup unflavored soda water
- Coat the cauliflower: Dip each cauliflower floret into the batter, making sure each piece is evenly coated. You can use a spoon or your hands for this.
- Bake the cauliflower: Place the battered cauliflower florets in a single layer on the prepared baking pan, cut side down. Bake for 15 minutes.
- Prepare the buffalo sauce: Mix together the vegan butter, sriracha, and gluten-free soy sauce in a bowl. Whisk until well combined, then set aside.4 tablespoon vegan butter, 2 tablespoon sriracha, 1 tablespoon gluten-free soy sauce, 2 teaspoon brown sugar, 1 teaspoon lime juice
- Prepare the salt & vinegar sauce: Mix together the white vinegar and salt in another bowl. Set aside.1 cup white vinegar, 1 tablespoon salt, 1 teaspoon italian seasoning, 1 teaspoon lime
- Coat & Bake Buffalo Wings: Remove half of the cauliflower from the oven and toss in buffalo sauce, using tongs to coat evenly. Shake off excess and return to the pan.
- Final bake: Bake for another 5–8 minutes until golden brown. For an extra crispy finish, broil for 1 minute, watching closely to prevent burning.📌 Air Fryer Option: Set to 400°F (200°C) and cook for 12–15 minutes, flipping halfway.
- Toss & Serve: Toss the remaining unsauced cauliflower wings in the salt and vinegar sauce, coating well. Re-coat the buffalo wings in any remaining buffalo sauce for extra flavor.
Notes
- Refrigerate leftovers in an airtight container for up to 2 days.
- Reheat in the oven at 400°F (200°C) for 5–7 minutes, or use the air fryer for the crispiest results.
- Ensure your cauliflower florets are dry.
- Let the batter rest for 5–10 minutes before coating the cauliflower.
- Don’t overcrowd the pan.
Nutrition
📝Information Source
- Zeisel, S. H., & Da Costa, K. A. (2009). Choline: An essential nutrient for public health. Nutrition Reviews, 67(11), 615-623.
- Travica, N., Ried, K., Sali, A., Hudson, I., Scholey, A., & Pipingas, A. (2017). Vitamin C status and cognitive function: A systematic review. Nutrients, 9(9), 960.
- Calder, P. C. (2010). Omega-3 fatty acids and inflammatory processes. Nutrients, 2(3), 355-374.
- Liu, R. H. (2013). Health-promoting components of fruits and vegetables in the diet. Advances in Nutrition, 4(3), 384S-392S.
- Sedlak, D. L., & Hoyle, G. W. (2019). Neuroprotective Effects of Glucosinolates. In Glucosinolates (pp. 299-318). Academic Press.






Bujji says
Thank you for this delicious recipe. It was pretty quick and easy to put together. Made it with chickpea flour. This way I can consume a whole head of cauliflower by myself:) Thank you!!
atmytable says
Amazing to hear! Thank you so much for your lovely feedback!
Archie says
Thanks a lot for the article post.Much thanks again. Fantastic.
atmytable says
Thank you Archie!