Our Gluten-free Tart Shells have a delightfully flaky texture and a rich, buttery flavor that beautifully complements any filling, from lush fruits to savory quiches. We tested three different gluten-free flour mixes to find the best one and offer alternatives for making gluten-free pies.

This post may contain affiliate links. The content provided is for informational purposes only and is not intended to serve as medical advice. For more details, please refer to our disclaimer page.
Jump to:
Ever wonder why some gluten-free tart shells turn out better than others? We tested three different gluten-free flour mixes to ensure we give you the best version for making gluten-free pies! Spoiler: The winner might surprise you!
If you’re like me, trying to navigate the gluten-free baking world without losing your mind, you know the struggle is real, especially with tart shells. They can be hit or miss. I have been on a gluten-free diet for over 10 years now, and getting perfect gluten-free desserts is very possible! Nothing beats a warm easy gluten-free pie crust!
So, I rolled up my sleeves and tested three gluten-free flour mixes to see which one actually delivers. I’ve got kids to feed, articles to write, and no time for baking flops. Whether you can't handle nuts or just can't find that "recommended" flour, I've got your back.
👪Why You'll Love This Pie Shell
- Perfect Texture: Our tested recipe ensures you get the perfect texture every time, achieving that elusive flaky and buttery crust.
- Easy and Versatile: This recipe uses simple, accessible ingredients and basic pantry staples. It's also incredibly versatile—you can fill it with your favorite sweet or savory fillings.
- Nut-Free Option & Allergy-Friendly: Our gluten-free tart shells are made with nut-free, egg-free, and gluten-free ingredients. And can easily be made dairy-free (vegan).
- Homemade Quality with Store-Bought Convenience: This recipe is straightforward and foolproof, allowing you to achieve homemade, bakery-quality gluten-free pies without spending hours in the kitchen.

🌾Best Gluten-Free Flour Mix For Tart Shells
I’ve been around the gluten-free block a few times. And I've learned not all gluten-free flour mixes are created equal! So I tested three to see which makes the best tart shell, considering texture, taste, and ease of use. And because I know some of you have to avoid nuts, I included a nut-free option.

Mix 1:
- Rice Flour: Rice flour provides a neutral flavor and a light, airy texture, making it an excellent base for pie crusts that don't overpower the filling's taste.
- Cassava Flour Cassava flour adds elasticity and binding properties to the mix.
- Tapioca Flour: Tapioca flour contributes to a crisp and flaky texture in the crust.
- Water: This mix took the least amount of water!
Gluten-Free Flour Mix 2:
- Gluten-Free All-Purpose Flour: I also used Bob's Red Mill, this is my favorite gluten-free flour mix because it doesn't need as much liquid to hydrate.
- Almond Flour: helps retain moisture
- Water: This mix uses ¼ cup of water.
Mix 3:
- 1-to-1 Gluten-Free Flour: Mix 1 is the easiest recipe, using only a premixed flour blend. For accessibility, I picked Bob's Red Mill 1-1 flour mix, available in most grocery stores (I live in Canada).
- Water: This mix required the most amount of water (6 tablespoon more) because of the blend.

The Gluten-Free Mix Winner?
Mix 3 (Bob's Red Mill 1-to-1) was the winner for making the best gluten-free pies. It created a moist, flaky crust that held together better and could take on a dense filling. Mix 1, a tad drier but still solid, was the runner-up. This mix has no xantham gum, which is perfect if gums bother you. Surprisingly, Mix 2 was a flop! The crust was too crumbly and fell apart before we could fill it.

🥧Main Ingredients
Here are the simple ingredients you will need to make your gluten-free tart shells. Check out the section above on which mix to use if you want an alternate flour mix.

- 1-to-1 Gluten-Free: After testing various mixes and flours I recommend using Bob's Red Mill 1-1 gluten-free flour, or something similar (like King Author measure for measure).
- Powdered Sugar: Helps to add sweetness to your dough (If following a vegan diet ensure your brand is vegan)
- Salt: Just a pinch to enhance the flavors
- Butter (Dairy or Non-Dairy): Ensure your butter is cold and cut into small pieces for the perfect flaky crust. For a dairy-free pie crust use a vegan alternative (see substitutions for brand suggestions).
- Water: Adjust your water to the flour mix you are using (see the above section and recipe notes)
- Cinnamon: A dash to add depth to your gluten free tart crust recipe.
For full quantities, see the recipe card at the end of this post. Ensure you check your ingredients for gluten-containing products and if it is safe for celiac disease!
👩🏽🍳Step-By-Step Instructions
Step 1: Combine Dry Ingredients
In a large mixing bowl, whisk together your chosen gluten-free flour mix, powdered sugar, cinnamon, and salt until well combined. This simple blend of ingredients will lay the foundation for your gluten-free tart shells.


Step 2: Incorporate Vegan Butter
Add the cold, cubed vegan butter to the bowl. Using a pastry cutter or your fingers, work the butter into the dry ingredients until the mixture resembles coarse crumbs.


Chef Tips: The goal is to achieve a sandy texture with some pea-sized pieces of butter throughout, which is crucial for that flaky crust we're after.
Step 3: Add Water
Stir in the vanilla extract. Gradually add cold water, a tablespoon at a time, mixing until the dough starts to come together. Be mindful of the water amount—add it slowly.


What Should It Look Like? Gluten-Free tart shell dough should be just combined, not too wet or sticky (almost like play-doh). The amount of water needed may vary depending on the gluten-free flour mix used.
Step 4: Chill the Dough
Once mixed, shape the dough into a ball and wrap it tightly in plastic wrap. Refrigerate for at least 30 minutes. Chilling firms up the vegan butter, making the dough easier to roll out and helping to prevent the gluten-free tart shells from shrinking during baking.


Step 5: Preheat Oven and Prepare Pans
Preheat your oven to 350°F (175°C). Prepare your tart pans by lightly greasing them. If your pans have a removable bottom, ensure it's securely in place.
Step 6: Roll and Shape
On a lightly floured surface (using GF flour), roll out the dough with a rolling pin to about ⅛ inch thick. Carefully transfer the dough to your tart pan, pressing it gently into the bottoms and up the sides. Trim any excess dough from the edges. If the dough tears, simply press it back together.


Step 7: Bake
Prick the bottom of the tart shells with a fork to prevent bubbling. Bake in the preheated oven for 15-20 minutes, or until the edges are golden brown. The baking time will depend on the size of your tart pans.


Step 8: Cool
Allow the tart shells to cool completely in the pans on a wire rack before filling. This step is crucial for ensuring your gluten-free tart shells hold their shape when removed from the pans.

💡Recipe Tips
- Dough Texture: If the dough feels too crumbly, add a bit more cold water, teaspoon by teaspoon, until it reaches the desired consistency.
- Keep Butter Cold: One secret to a flaky gluten free pie crust recipe is using cold vegan butter. This prevents the fat from mixing too thoroughly with the flour, creating those coveted layers as it bakes. Chop your butter into small pieces and keep it in the refrigerator until the last moment.
- Rolling Out Tips: When rolling out dough, place it between two pieces of parchment paper. This prevents sticking without the need for additional flour and makes cleanup a breeze!
- Poke to Perfection: Don't forget to poke holes in the bottom of your tart shells before baking.
- Achieve a Heavy-Duty Shell: For a firmer crust that can withstand moist fillings, blind-bake the shells with pie weights or dried beans for the first 10 minutes of baking.
- Add Flavor Infusions: Personalize your tart shells by adding flavors like lemon zest or cinnamon to the dough, complementing your chosen filling.

⏲️ Time-Saving Tip
- Prep in Advance: Make your dough ahead of time. Gluten-free tart dough can be refrigerated for up to 48 hours before use or frozen for longer storage. When you're ready to bake, simply thaw overnight in the fridge.
- Batch Baking: If you're making multiple gluten-free tart shells, consider baking them all at once. Baked gluten-free pies can be stored in the freezer. When you need one, just add your filling and bake. Pre-baked shells don't need to be thawed!
🌿Recipe Substitutions
I often decide to recipe last minute or find myself without time to get specific ingredients. So if you need an alternative or can't find an ingredient for making your gluten-free pies here are some suggestions:
- Flour Mix Swap: If you can't find Bob's Red Mill 1-to-1 Gluten-Free Baking Flour, use another 1-1 (or measure for measure) brand. Select one with similar ingredients (white rice flour, brown rice flour, sorghum, tapioca starch, xantham hum) for best results. You can also use the ingredients in Mix 3 (Rice, Cassava, tapioca).
- Sugar Alternatives: If you're looking for a lower glycemic index option, swap out powdered sugar for a vegan alternative, such as monk fruit powdered sugar.
- Dairy-Free Butter: Any brand of vegan butter works. Keeping it cold is non-negotiable for that flaky crust! Here are some recommendations:
- Miyoko’s Creamery Organic Vegan Butter
- Earth Balance Soy-Free Buttery Sticks
- Country Crock Plant Butter Sticks

🫐Filling Your Gluten-Free Tart Shells
Now that you've baked up some perfectly flaky gluten-free tart shells, it's time to think about the fun part—filling them!
- Pre-Bake Your Gluten-Free Tart Shell: For wet fillings (like custards or fresh fruit), pre-bake your gluten-free pies until golden. This "blind baking" seals the crust, preventing sogginess.
- Fill Your Shell: Fill your tart shell three-quarters full, whether a sweet or savory mixture. Stop the egg mixture about ¼ inch from the top for quiches to accommodate puffing during baking.
- Bake: Lower temperatures (325°F to 350°F) are best for custards, ensuring they set without burning the crust. Bake until the filling is set but still slightly wobbly in the center for custards. Aim for a fully set filling and a golden-brown crust for savory fillings.
- Cooling Down: Let your gluten-free tarts cool on a wire rack for at least 1-2 hours before slicing. This step is crucial for fillings to be set properly. For no-bake fillings, chill the tart in the refrigerator to firm up before serving.
Here are some ideas to get you started:
- Apple Crumble Gluten-Free Pie: Coming this week! Our gluten-free apple pie with crunchy apples and a crumble top is delish!
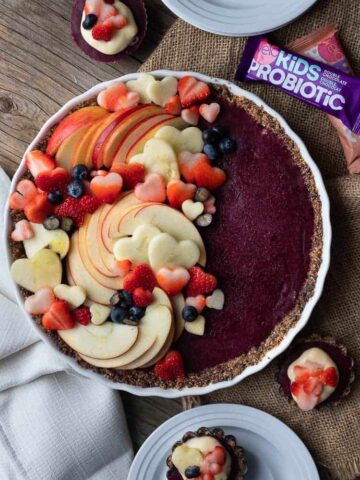
- Classic Fruit Tart: A classic tart filling! Check out our no-bake blueberry pie filling here.
- Lemon Meringue Tart: Tangy lemon curd is paired with a fluffy, toasted meringue topping! Nora Cooks has a great vegan lemon meringue pie filling to add to this gluten-free vegan tart crust!
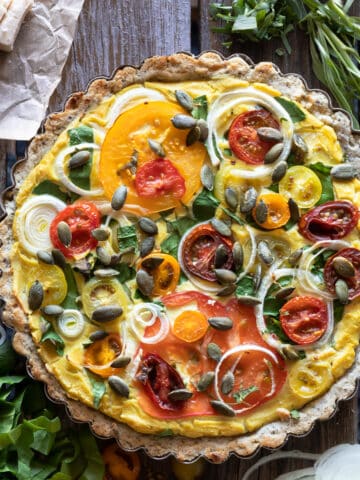
- Gluten-Fee Quiche: Your gluten-free tart shells are an excellent base for quiche. And we have a delicious Quiche recipe (with another shell alternative here)
- Caramelized Onion and Gruyere Tart: Fill your gluten-free tart shell recipe with a mixture of slowly caramelized onions and shredded Gruyere cheese. Bake until the cheese is bubbly and golden for a tart that's packed with sweet and savory goodness.
- Gluten-Free Pot Pies

🥡Storage
- Refrigerator: Baked and cooled tart shells can be stored in the refrigerator in an airtight container for up to five days.
- Freezer: To store the baked tart shells for longer, freeze them. They can be frozen for up to 3 months. Thaw in the refrigerator or bake straight from the freezer, adding a few minutes to the baking time.
❔Recipe FAQ
Yes, you can prepare and bake the tart shells up to 3 days in advance. Just store them in an airtight container at room temperature until you're ready to fill them. Or freeze for up to 3 months.
If your gluten-free pie dough is too sticky, it might have absorbed too much moisture. Try adding a little more GF flour, a tablespoon at a time, until the dough reaches a workable consistency. Remember, gluten-free flour blends can vary in absorbency.
Absolutely! This gluten-free dough also works well for pies. The baking time might need to be adjusted based on the size and depth of your pie dish. Blind baking the crust for pies with wet fillings is recommended to prevent sogginess.
🌟 Loved this gluten-free tart recipe? Let’s connect! Your feedback helps me improve and helps other readers discover new favorites. Leave a star rating and share your thoughts and what you want to see next in the comments below. You can also find me on Facebook and Instagram for more tasty conversations and tips.
🥣You Might Also Like...
📖 Recipe

Easy Gluten-Free Tart Shells (Nut-Free, Vegan Option)
Ingredients
- 2 cups Gluten-Free 1-1 Flour (Bobs Red Mill Recommended) see notes for mix options
- ¾ cups powdered sugar
- ¾ cups butter cold and cubed
- 4 - 6 tablespoon cold water adjust as needed
- 1 tablespoon cinnamon
- 1 teaspoon salt
Instructions
- Prepare Dry Mix: Whisk gluten-free flour, powdered sugar, cinnamon, and salt in a large bowl. This dry mix forms the base of your tart dough.2 cups Gluten-Free 1-1 Flour (Bobs Red Mill Recommended), ¾ cups powdered sugar, 1 tablespoon cinnamon, 1 teaspoon salt
- Blend in Butter: Add cold, cubed butter. Blend using a pastry blender or fingers until the mixture resembles coarse crumbs with pea-sized butter lumps.¾ cups butter
- Form Dough: Gradually add water until dough forms. It should be pliable but not sticky (similar to Play-Doh).Tip: Depending on your flour mix, you may need to add up to 2 additional tablespoons of water.4 - 6 tablespoon cold water
- Chill: Shape dough into a ball, wrap in plastic, and chill for 30 minutes.
- Preheat: Set your oven to 350°F (175°C) and lightly grease your tart pans.
- Roll Out: On a lightly floured surface (use GF flour), roll out the chilled dough to about ⅛ inch thickness. Carefully lift the dough and place it into your prepared tart pans, pressing it into the corners and sides. Trim any excess dough from the edges. If the dough tears, simply patch it up with excess dough.
- Bake: Prick bottoms with a fork. Bake 15-20 minutes until golden. Cool before filling.
- Cool: Allow the baked tart shells to cool completely in their pans on a wire rack. Then store or fill.
Notes
- Homemade Mix
- 1 cup rice flour
- ½ cup cassava flour
- ½ cup tapioca flour
- Water: you might need less water; start with 4 tablespoons and adjust.
- Gluten-Free AP Mix
- 1 ½ cups All-Purpose Gluten-Free Flour
- ½ cup Almond Flour
- ¼ Water: adjust the water
- Dough Tips: If the dough is too crumbly, add water teaspoon by teaspoon. If too sticky, add a little more GF flour.
- Baking Tip: For wet fillings, consider pre-baking (blind baking) the tart shells for 10 minutes with pie weights, then remove weights and bake until fully golden.


Leave a Reply