Paçoca is a traditional Brazilian peanut treat that crumbles with every bite and has a rich, roasted peanut flavor and a sweet, melt-in-your-mouth texture that’s impossible to resist.

This post may contain affiliate links. The content provided is for informational purposes only and is not intended to serve as medical advice. For more details, please refer to our disclaimer page.
✋🏼E aí, pessoal! Hey there, friends!
Today, we are continuing our Brazilian dessert series with the famous Pacoca recipe! And let me tell you, there is something magical about biting into a piece of paçoca—the way it crumbles in your mouth with that sweet, nutty flavor—so simple yet so satisfying.
This traditional Brazilian treat is a nostalgic favorite of mine, taking me right back to my childhood. Growing up, we celebrated festa junina, a fun and colorful festival held every June. I remember dressing up for my kindergarten performance—wearing my big straw hat, painted freckles, and overalls. Afterward, we would rush to the treat table and paçoca was always my first choice. I would savor its sweet roasted flavor while the crumbly texture melted in my mouth. With brigadeiro, a gooey Brazilian truffle, as my next favorite, of course!
Luckily, this Brazilian treat is extremely easy to make. With just three ingredients and 15 minutes, you can recreate pacoca to enjoy with your family—or keep it all to yourself! Plus, I am sharing a little family recipe secret—roasting the peanuts first makes all the difference (so don't tell anyone, wink 😏). Whether you’re new to Brazilian sweets or a long-time pacoca lover, this recipe brings that traditional taste to life.
If you are a peanut lover, be sure to check out our Brazilian Cajuzinho or peanut butter cups smoothie recipe!
😍Why You'll Love Paçoca Casseiro
- Three Ingredients, Ready in 15 Minutes: Our paçoca recipe comes together quickly with just 3 simple ingredients, making it perfect for busy days.
- Authentic Brazilian Flavor, Great Crumbly Texture: Bring a taste of Brazil to your home with this traditional treat. It’s a sweet, nutty, and slightly crumbly candy that melts in your mouth.
- Naturally Gluten-Free: This sweet treat is naturally gluten- and dairy-free, making it easy for those with dietary restrictions to enjoy.
- Fun and Versatile: Whether for a festa junina or a quick snack, our paçoca recipe is easy to shape, making it fun for kids and perfect for any occasion.
More Brazilian Treats and Desserts:

🤔What is Paçoca?
Paçoca has a deep history in Brazilian culture, shaped by both its Indigenous roots and the impact of colonization and slavery. Originally a savory dish made by the Tupi and Guarani tribes, pacoca was a practical, portable food made by grinding cassava flour (manioc flour) with dried meat and salt. The word pacoca actually comes from the Tupi language, meaning “to crumble” or “to grind" 😉.
During colonization, Brazil became a hub for global trade, and peanuts were introduced through both African and European traders. Enslaved Africans and Portuguese settlers contributed to the evolution of Brazilian cuisine, and over time, peanuts replaced dried meat in pacoca, transforming it into the sweet, crumbly treat that Brazilians enjoy today.
By the time festas juninas, a June celebration honoring Saint John the Baptist, became widespread, this sweet version of paçoca had become a festival favorite. Its simplicity—just peanuts, sugar, and salt—has kept it a loved part of Brazilian tradition, reflecting both its Indigenous origins and the influence of colonization and trade.
🥜Main Ingredients
Pacoca is a super simple treat, with only three naturally gluten- and dairy-free ingredients, and is a perfect recipe for peanut lovers! Here is what you will need to make your own pacoca:

- Roasted Peanuts (unsalted and skinless): I prefer to use roasted peanuts to help deepen the flavors of this Brazilian treat recipe. I also prefer to roast them again to help bring out the natural oils and flavors before making pacoca. This step will give you a richer, deeper Pacoca, so don't skip this part!
- Granulated Sugar: This adds sweetness and helps bind the recipe together, creating the classic texture of paçoca.
- Salt: A small amount of salt balances the sweetness in paçoca and brings out the peanut flavor even more. It also adds that perfect sweet-salty combination many paçoca lovers enjoy.
Full details and quantities can be found in the recipe card below.
⚠️Gluten Alert: Be cautious of cross-contamination with peanuts if buying from bulk bins, as they may not be labeled gluten-free.
👩🏽🍳Step-By-Step Instructions
Step 1: Prepare the Peanuts
I strongly recommend roasting your peanuts (even if you are using store-bought roasted peanuts) to enhance the overall flavor of your pacoca de amendoim recipe.
Preheat your oven to 400°F (200°C). Spread the peanuts in a single layer on a lined baking sheet and bake for about 5-8 minutes, stirring frequently. They’ll be ready when they become fragrant and lightly golden. Let them cool completely before proceeding to the next step.


Step 2: Grind
Add the toasted peanuts, granulated sugar, and salt to a food processor. Pulse the mixture until it's crumbly and fine, but don’t over-process. You want a wet sand texture that holds together when pressed but isn’t as smooth as peanut butter (see images). A great test is to pinch a bit between your fingers; it should hold its shape if ready.


Step 3: Shape the Pacoca
There are two shaping options here. My favorite is using cookie cutters for fun shapes. Traditionally, Pacoca is served as small rectangles or squares so bonus points if you have that shape :0)
Cookie Cutter Method: Press the ground peanuts into the mold as if you’re building a sandcastle—pack it in tightly! Then, gently push down on the top and lift the mold, allowing the shape to hold.


Baking Dish Method: If you don’t have cookie cutters, press the mixture into a square baking pan or dish lined with parchment paper and let it set.

Step 4: Set Then Serve
IF you are using the dish method, let the pacoca sit at room temperature for 30 minutes to firm up. Then ahead and break or cut the pacoca into rectangles or squares. Then serve. My mother served it with a banana; we would then crumble our pacoca and dip our banana into it! So yum

💡Recipe Tips: Get the Right Texture
- Roast the Peanuts for Max Flavor: Even if your peanuts are pre-roasted, toasting them again adds extra oils and deepens their flavor. Trust me, it makes a massive difference in how the paçoca tastes.
- Don’t Over-Process: When grinding the peanuts, be careful not to let them turn into peanut butter! You want a crumbly, slightly wet texture that holds together when pressed but still looks like rough sand. A quick test is to pinch a bit between your fingers—if it sticks, it’s ready.
- Shaping with Cookie Cutters: I like using a rectangular cookie cutter to shape paçoca, but any shape will do as long as it's bite-sized. Get creative, using different shapes depending on the holiday or occasion. And get the kids involved! My boys love making paçoca with me.
- Press Gently to Avoid Crumbling: When shaping paçoca, use gentle but firm pressure to pack it in. Too much pressure may crumble when you try to remove it from the cookie cutter or dish.

🍴Pacoca Variation and Leftover Ideas
Tradition Pacoca is amazing as is, but if you need a slight twist or variation, these are some fun ways to change things up or use up any leftover peanuts or pacoca you may find yourself with
- Coconut Paçoca: Add a tablespoon of shredded coconut to the peanut mixture for a tropical twist that adds texture and flavor.
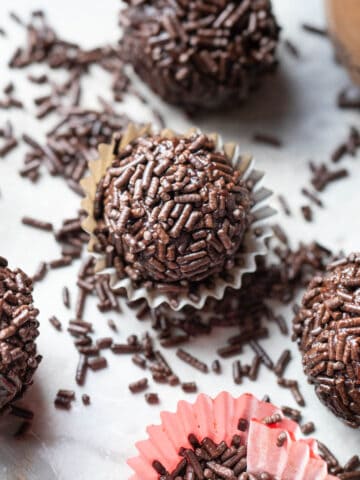
- Brigadeiro Paçoca: Use up leftover paçoca to make brigadeiro pacoca. You simply mix your paco with some condensed milk for a fun truffle-like (We love this recipe).
- Cajuzinho: If you have leftover peanuts, use them to make cajuzinho, another popular Brazilian sweet. (Recipe coming soon.)
- Brigadeiro Topping: If you have leftover peanuts or pacoca batter, save it for a brigadeiro topping. Roll your brigadeiros in the mixture for a nutty version!
🥡How To Store Paçoca
One of the best things about Pacoca is that it stores well and is very shelf-stable!
Store paçoca in an airtight container at room temperature for up to a week. To maintain its texture, keep it in a cool, dry place. There is no need for refrigeration unless your home is particularly humid. If you need your pacoca to last longer, pop it in the fridge for up to two weeks.

❔Recipe FAQ
If your paçoca is crumbling, it may not have been processed enough or is too dry. Make sure to process/ blend your peanuts until the batter is slightly moist and holds its shape when pinched. But be careful not to turn it into peanut butter!
Yes, you can use salted peanuts, but you might want to reduce or omit the additional salt in the recipe to avoid overpowering the flavor. Taste the paçoca mixture as you go to make sure it's balanced.
While some versions of paçoca use cassava flour, this recipe stays true to the more traditional approach passed down in my family, focusing solely on roasted peanuts. This method highlights the peanut flavor and gives the treat it's signature crumbly texture.
While some recipes out there add condensed milk paçoca is meant to have a crumbly, dry texture that comes from the peanuts and sugar. Adding condensed milk to pacoca would change the consistency, making it more like a candy fudge than a traditional paçoca. Plus, it makes our version a little more accessible, as cassava flour can be tricky to find.
🌟 Loved this pacoca recipe? Let us know! I’d be thrilled if you could leave a comment, star rating, or share this recipe. Your feedback helps support and improve AtMyTable and helps others discover new favorites. Or come chat with me on Facebook or Instagram!
🥣More Fun Brazilian Desserts
👋🏼Até logo, amigos! Keep savoring every bite and don’t forget—life’s better with a little flavor and fun. Até a próxima!
📖 Recipe

Paçoca: How to Make this Brazilian Peanut Treat
Ingredients
- 2 cups roasted peanuts unsalted and skinless
- ½ cup granulated sugar
- ¼ teaspoon salt
Instructions
- Prepare the Peanuts: Preheat the oven to 400°F (200°C). Spread the peanuts in a single layer on a lined baking sheet and roast for 5-8 minutes, stirring frequently. The peanuts are ready when they become fragrant and lightly golden. Let them cool completely before proceeding.
- Grind the Peanuts: Add the toasted peanuts, sugar, and salt to a food processor. Pulse until the mixture becomes crumbly and holds together when pressed, but be careful not to over-process into peanut butter. The texture should still have a bit of grit.2 cups roasted peanuts, ¼ teaspoon salt, ½ cup granulated sugar
- Shape the Paçoca: Press the mixture into cookie cutters, packing it tightly like building a sandcastle. Gently press down and lift the cutter to hold the shape.
- Dish Method: If you don’t have cookie cutters, press the mixture into a parchment-lined dish and let it set.
- Let it Set & Serve: Let the paçoca firm up at room temperature for about 30 minutes. If using the dish method, cut into rectangles or squares before serving. For a fun twist, serve it with banana slices, just like my mom did!


Leave a Reply