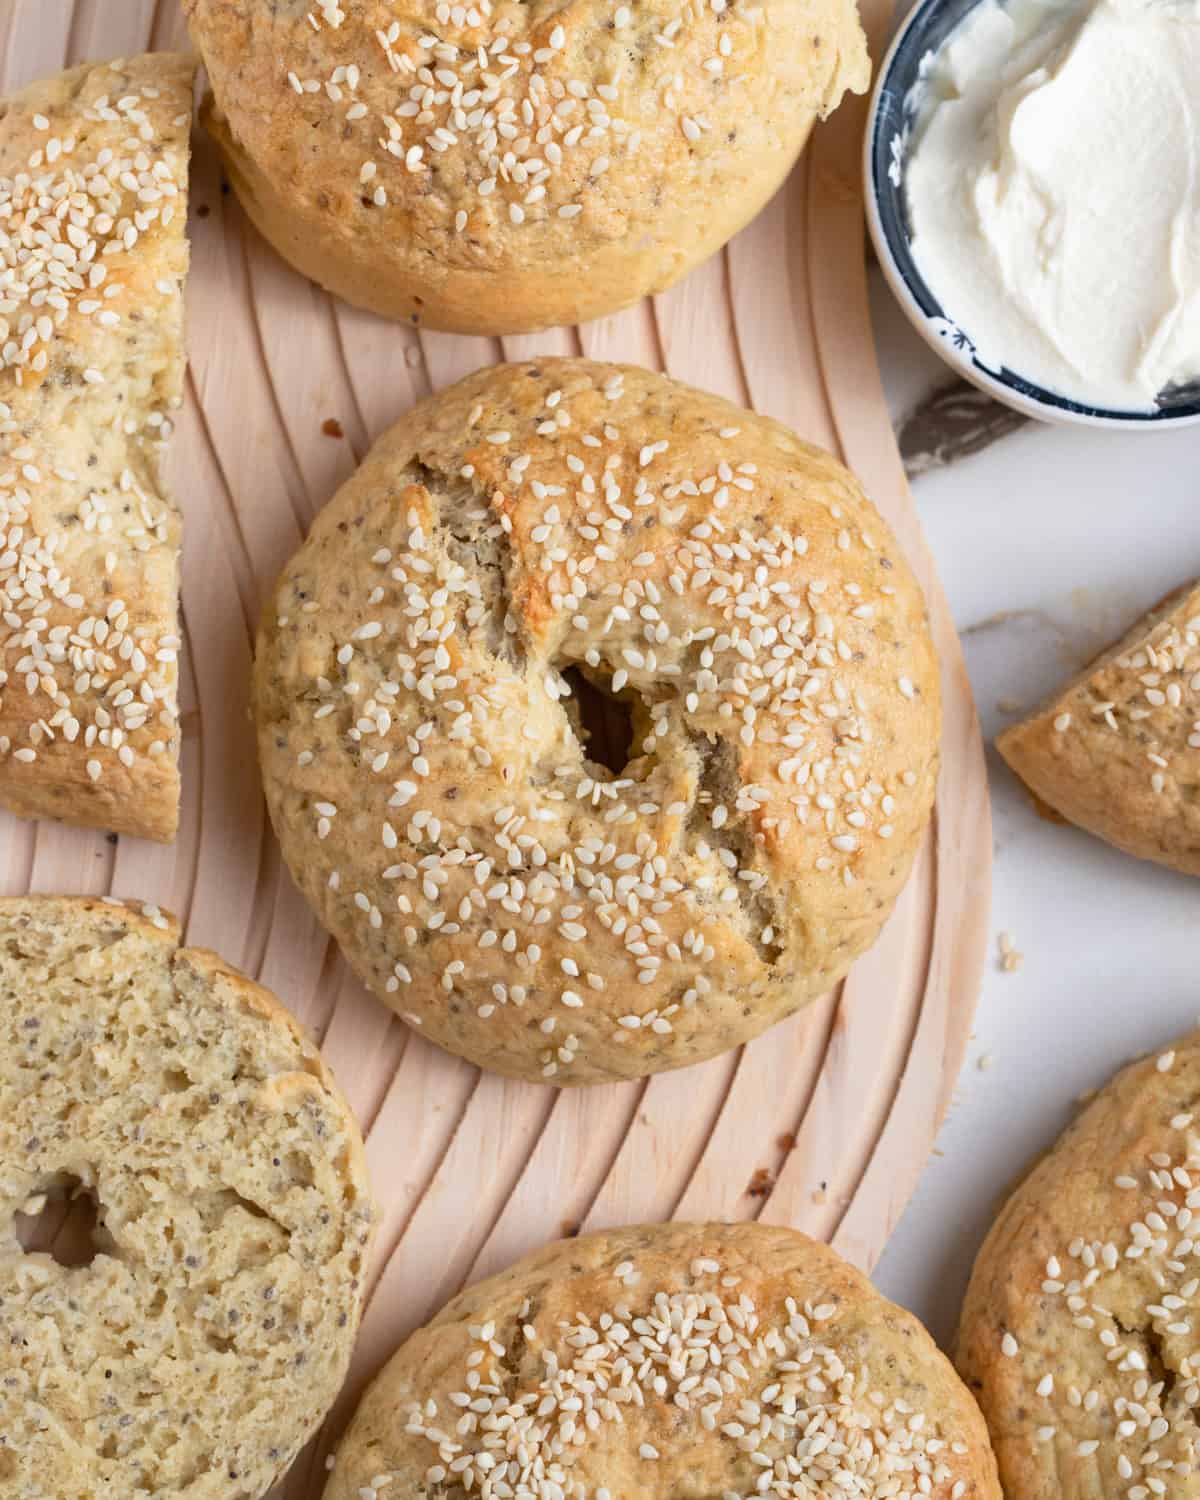
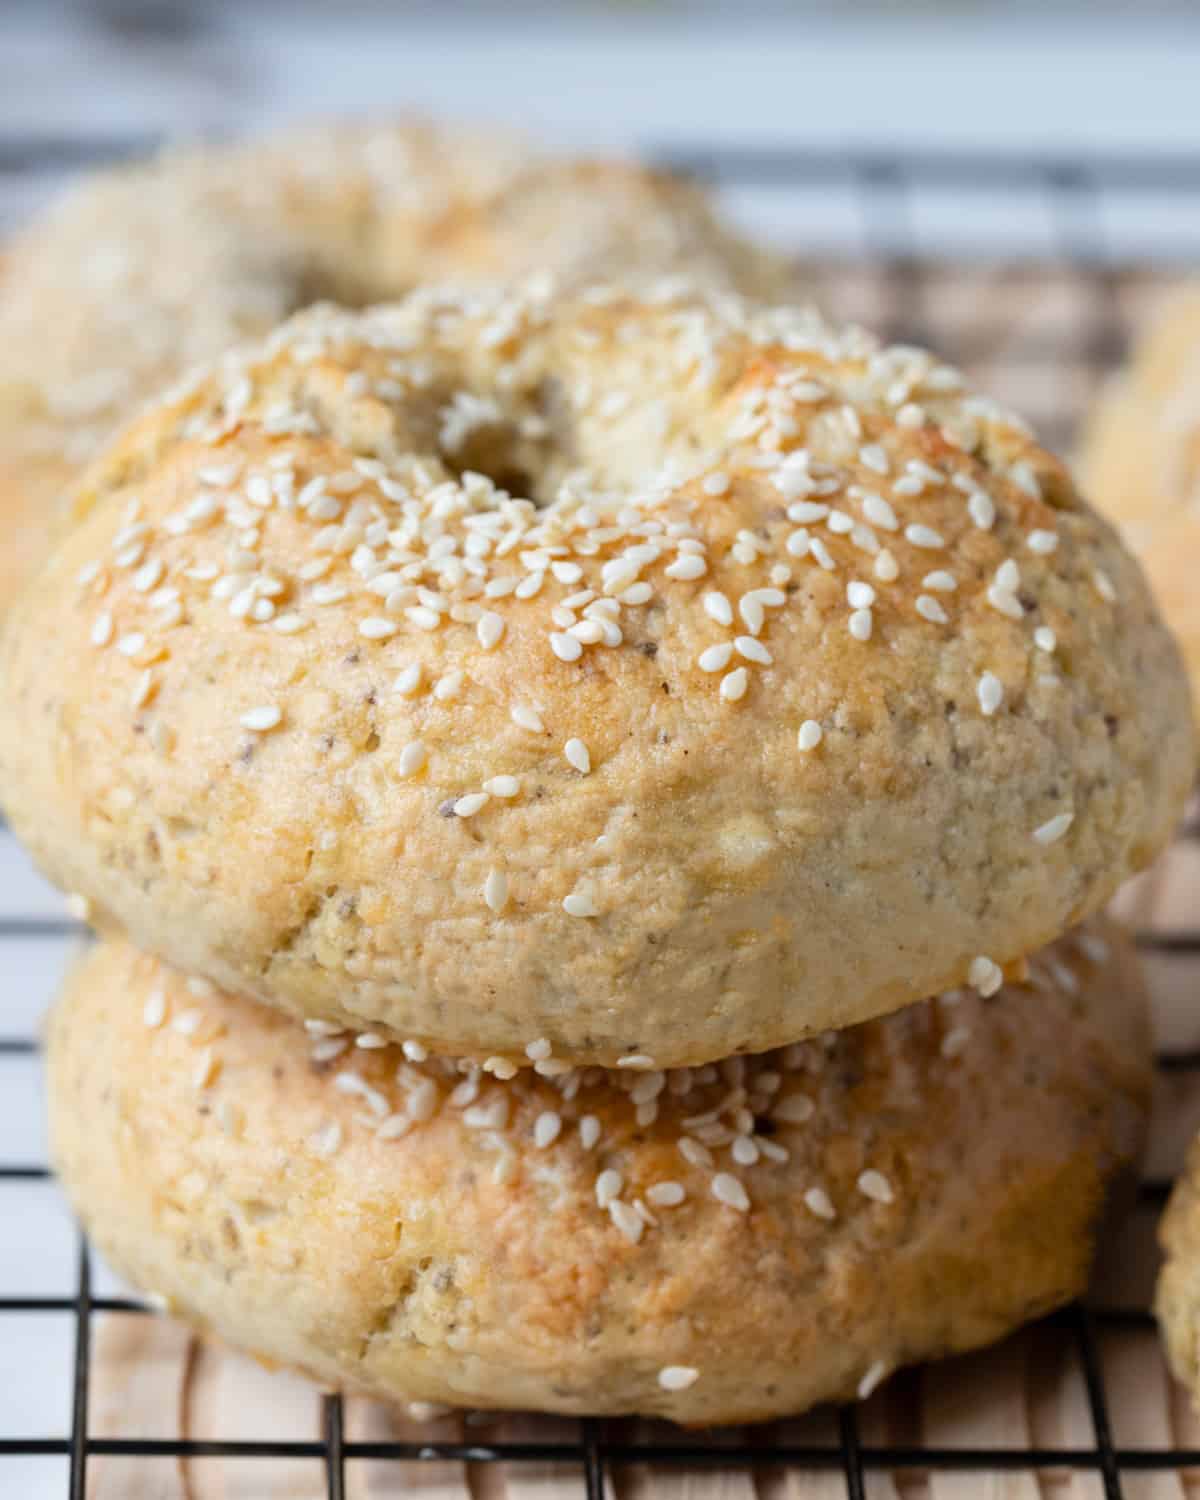
Crisp on the outside, soft and chewy on the inside—our gluten-free vegan bagels are your answer to bakery-quality bagels made at home. Allergy-friendly and simple to make, they’re perfect for breakfast, brunch, or anytime cravings!

This post may contain affiliate links. The content provided is for informational purposes only and is not intended to serve as medical advice. For more details, please refer to our disclaimer page.
✋🏼Hey there, friends! If you’re new here, welcome! I’m Patricia, a mom of three and longtime gluten-free foodie who’s spent the past decade perfecting recipes for our mixed-diet family. With picky eaters, allergy concerns, and the need for quick mornings, I’ve learned how to create recipes that check all the boxes—delicious, accessible, and stress-free.
Today, I’m thrilled to share my recipe for vegan gluten-free bagels—a game-changer for anyone who misses that perfect chewy texture and golden crust. Unlike store-bought options or recipes requiring long lists of specialty ingredients, these bagels use simple, accessible ingredients and deliver bakery-quality results without the fuss.
I created this recipe to solve some of the biggest frustrations I’ve faced with gluten-free and vegan baking. After experimenting with different egg substitutes and flour blends, I was determined to create a bagel that even my gluten-eating family would rave about. And let’s be honest, with three energetic boys running around, I needed a recipe that didn’t add more chaos to the mix!
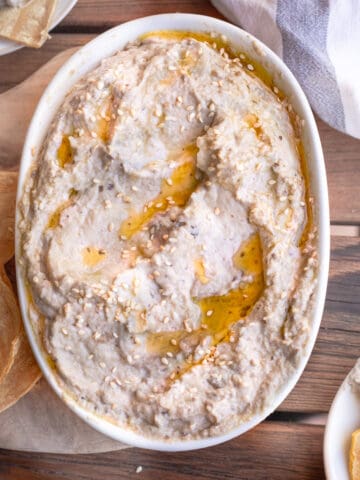
If you love our gluten-free vegan bagels, be sure to check out our easy smoky eggplant dip or homemade vegan ricotta cheese for the perfect bagel spread!
👪Why You'll Love This Recipe
- The Texture You’ve Been Craving: We know how hard it is to find a vegan and gluten-free bagel with the perfect chew. This recipe recreates that classic texture with no compromises, so you can enjoy bagels that rival your favorite bakery’s.
- Simple, Accessible Ingredients: No hunting for specialty items! This recipe uses easy-to-find, budget-friendly ingredients, making it approachable for even the busiest parents.
- Inclusive and Allergy-Safe: Crafted for mixed-diet households, our vegan gluten-free bagels satisfies everyone at the table. Whether you’re vegan, gluten-free, or just a bagel lover, these hit all the right notes.
- Step-by-Step Guidance for Foolproof Bagels: Whether you’re a seasoned baker or just starting out, our detailed tips and steps ensure success. You’ll feel confident making bagels at home, even if it’s your first time.
🍞How to Work with Gluten-Free Flour
After much experimentation to create the best vegan gluten-free bagels, I’ve found that not all gluten-free flours are created equal, and hydration is critical. After trying various blends, Bob's Red Mill AP Gluten-Free Flour—with its tapioca, cassava, and bean flours—stands out for its forgiving nature and balanced moisture requirements.
Unlike heavier rice or starch-based mixes that can lead to dense results, this blend helps achieve lighter, airier textures. But remember, gluten-free baking is a different ballpark, often resulting in a stickier, more batter-like consistency. You can read more about our top tips in the tips section below.

🥯Ingredient Notes
Making our gluten-free vegan bagels at home is easier than you think with these carefully chosen simple ingredients. Each one plays a key role in creating the perfect texture and flavor for bagels everyone can enjoy.
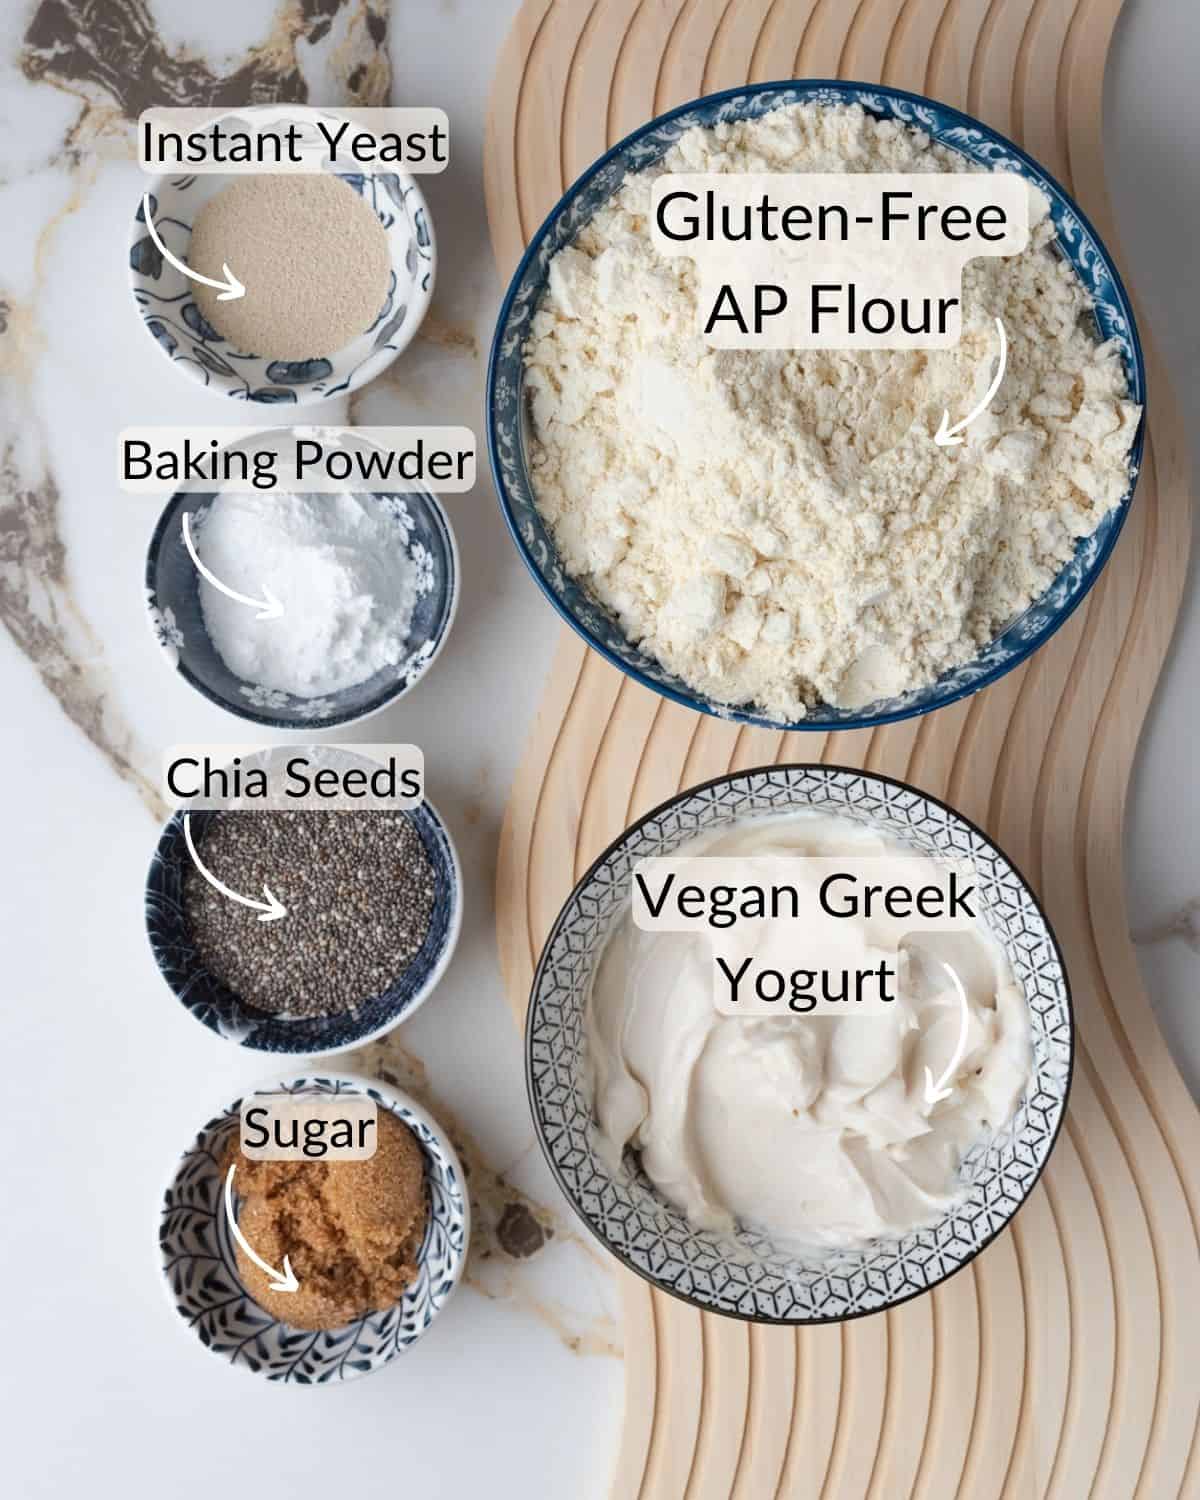
- Gluten-Free All Purpose Flour (Bob's Red Mill ): After plenty of trial and error, I found Bob’s Red Mill Gluten-Free All-Purpose Flour to deliver the best structure and taste. I highly recommend using this flour blend. Its balanced blend ensures the dough rises beautifully and results in chewy bagels that hold their shape.
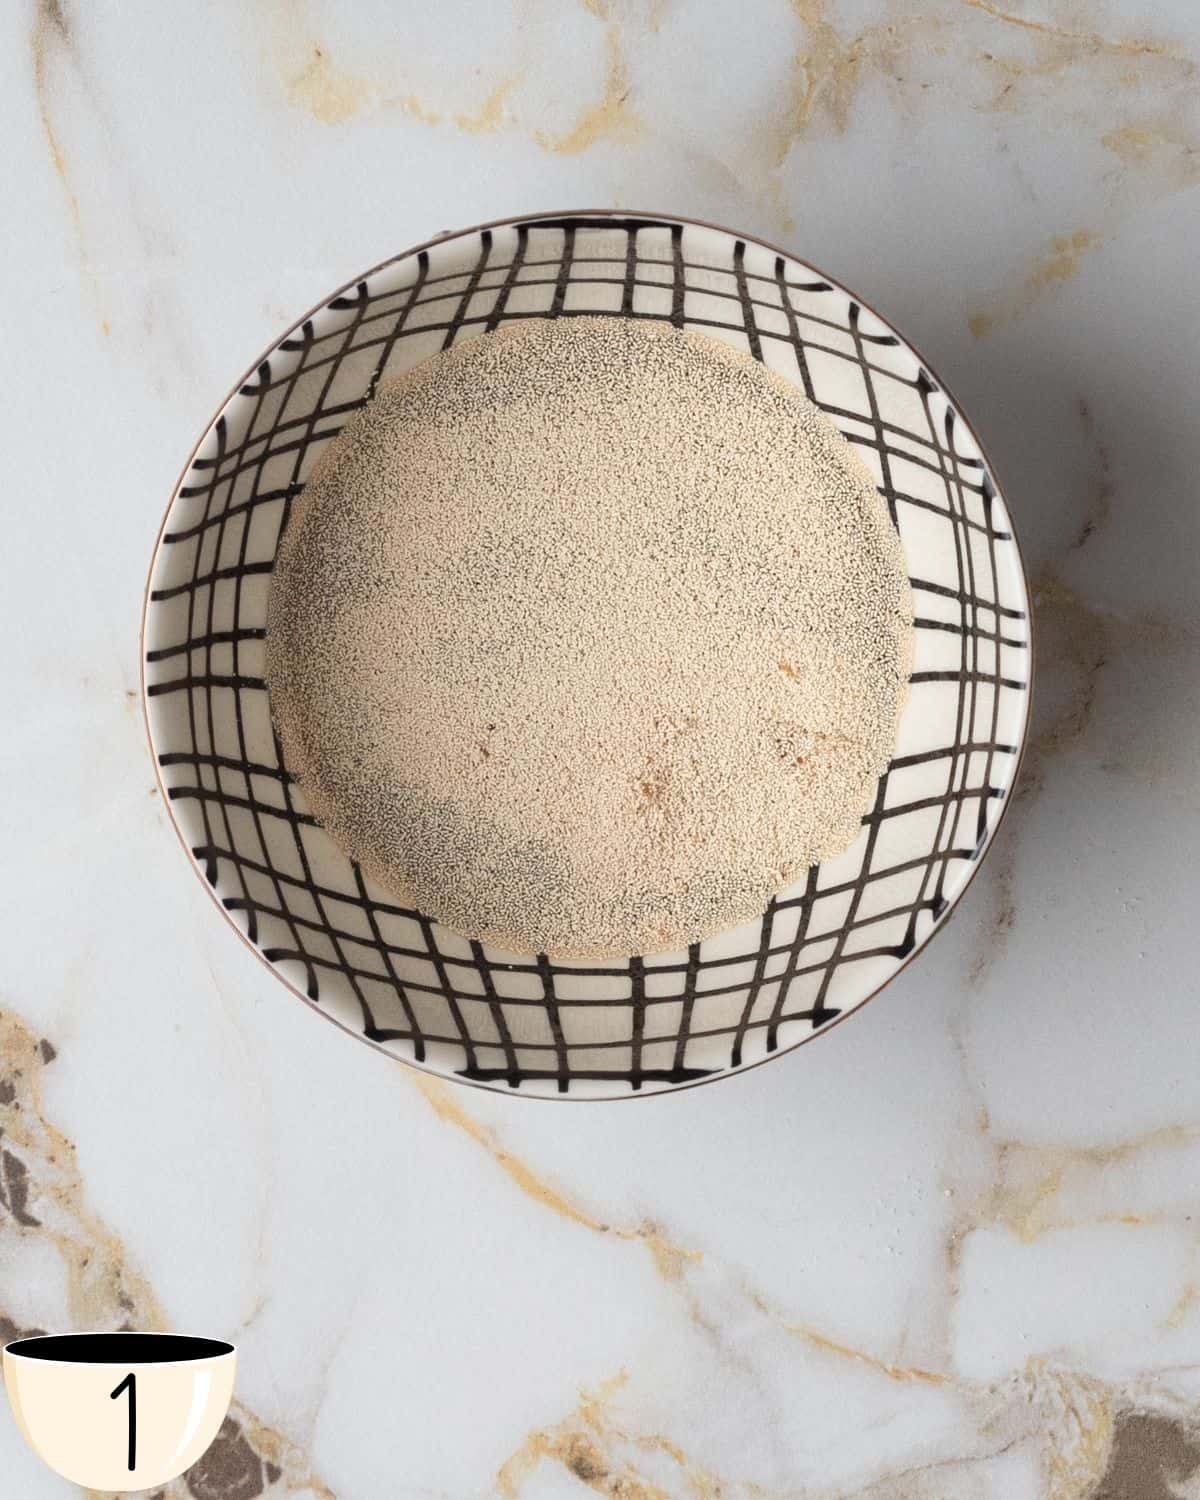
- Instant Yeast: I have updated this recipe to use instant yeast because it’s reliable and activates quickly, ensuring a consistent dough rise every time.
- Vegan Yogurt (Riviera Greek-Style Oat Yogurt): This ingredient brings moisture and a subtle tang to the bagels, giving them a unique depth of flavor. I used Riviera’s oat-based yogurt for this recipe to help add creaminess to the dough.
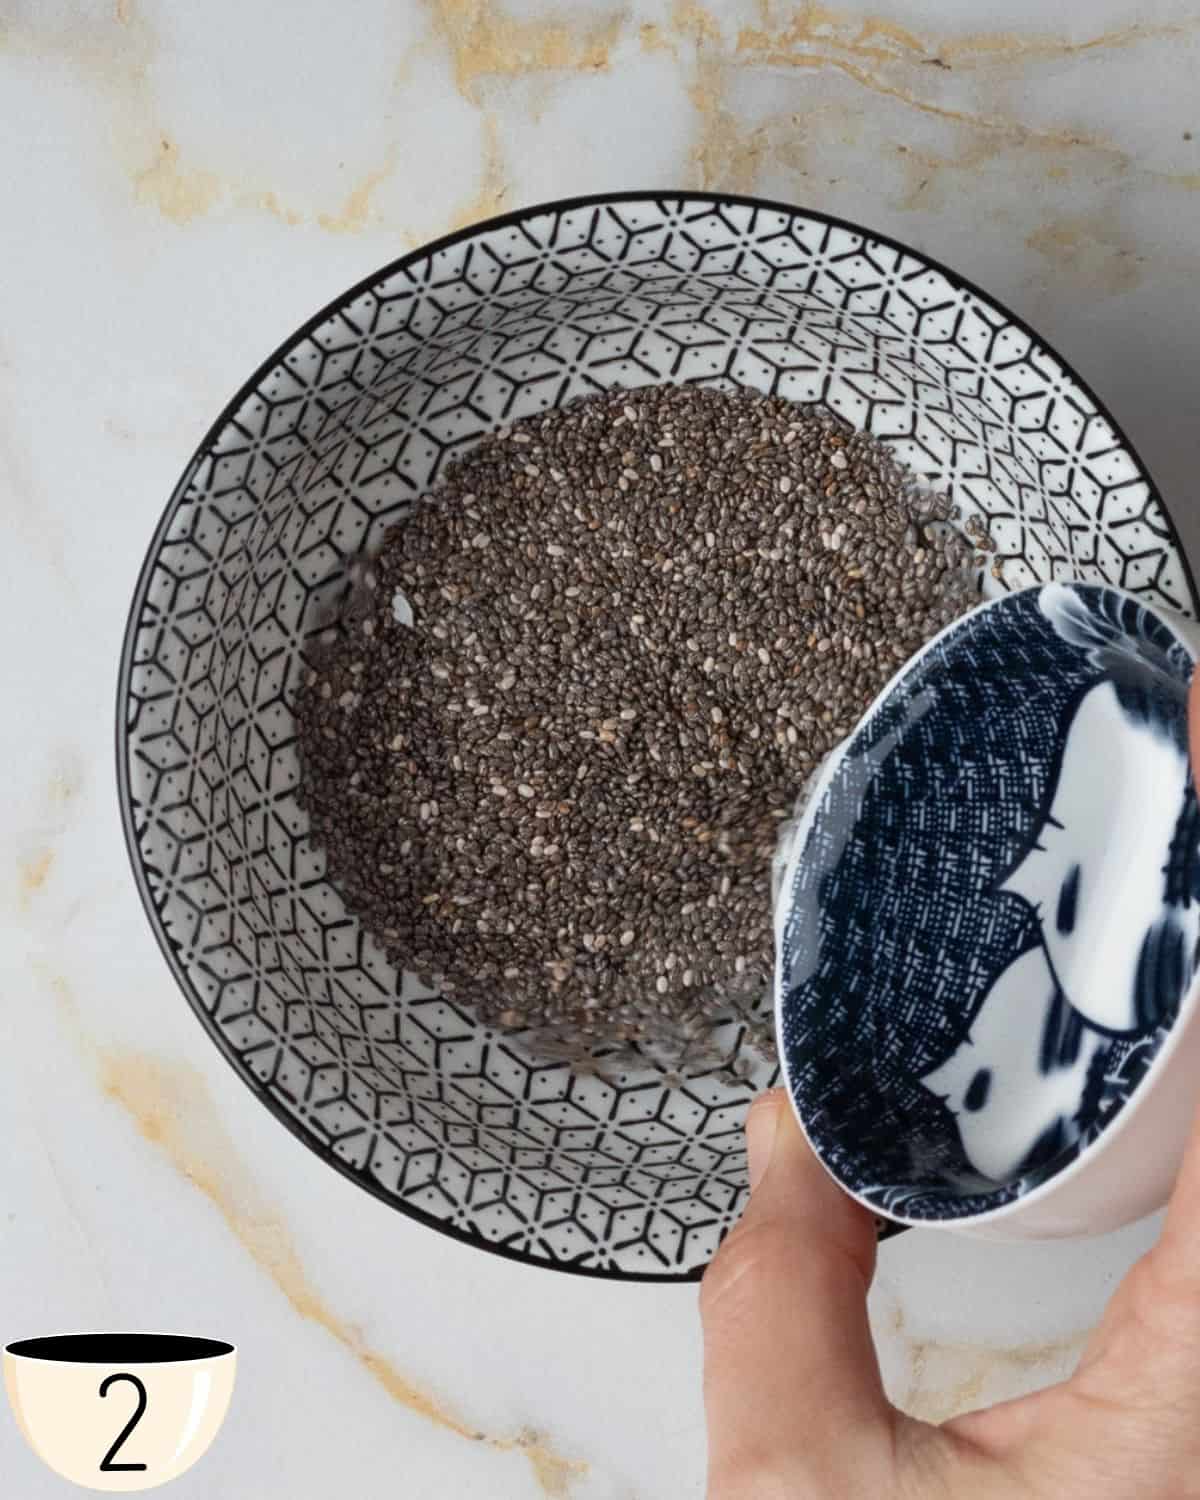
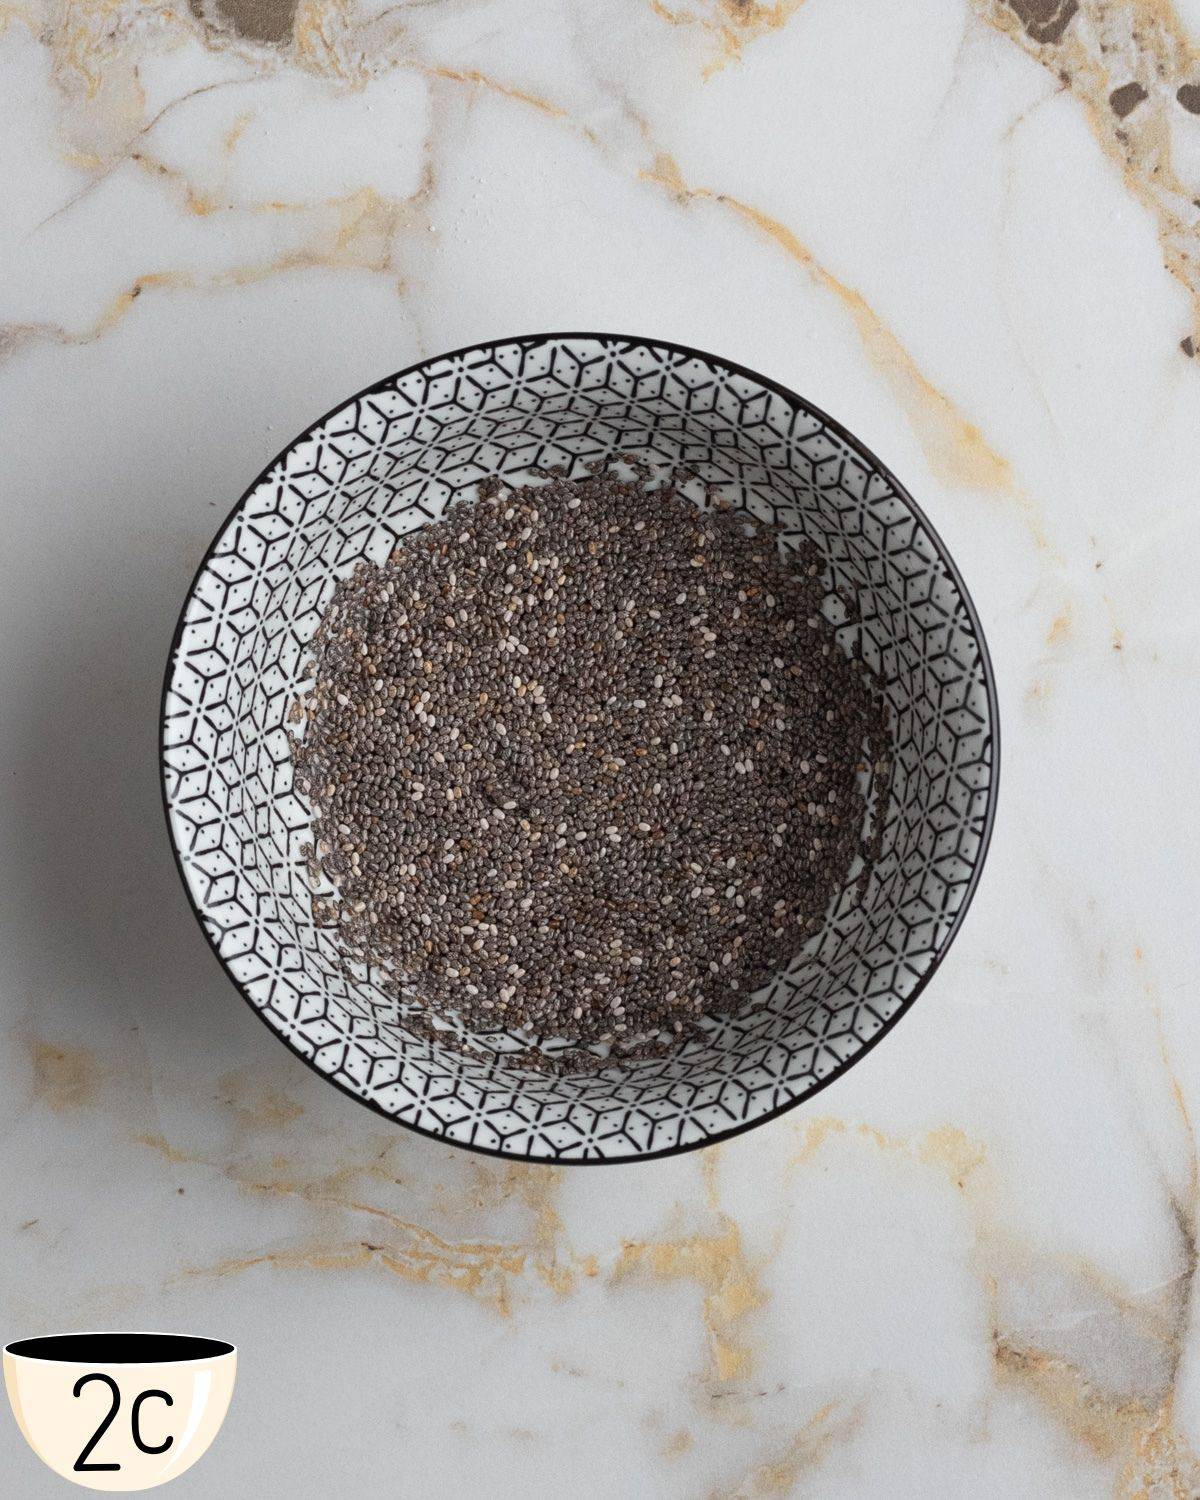
- Chia Eggs: Chia seeds are my go-to egg substitute for this recipe. When mixed with water, they form a gel that binds the dough, making it a key ingredient for free vegan bagels.
- Baking Powder: This helps the bagels rise even more, ensuring a light and fluffy texture that’s not too dense. It complements the yeast beautifully in this recipe.
- Sugar: Just a touch to help activate the yeast.
- Salt: Enhances flavor, bringing out the subtle tastes of our other ingredients.
- Olive Oil and salt (wash): This blend is brushed on the bagels before baking, adding a layer of flavor that makes these bagels stand out helping create a crust that's simply irresistible.
- Large Pot of Water for Boiling with Sugar: Essential for achieving that signature bagel chewiness. The boiling process is what sets bagels apart from ordinary bread.
For full quantities, see the recipe card.
⚠️ Celiac Alert: Always ensure that your ingredients, especially gluten-free flours and chia seeds, are certified gluten-free to avoid cross-contamination. This step is crucial for those with celiac disease.
🔁Substitutions & Variations
We get it—sometimes you don’t have every ingredient on hand. Luckily, our gluten-free vegan bagels are flexible, and you can make a few swaps without sacrificing flavor or texture. Here are some suggestions that have worked for us to help you adapt the recipe:
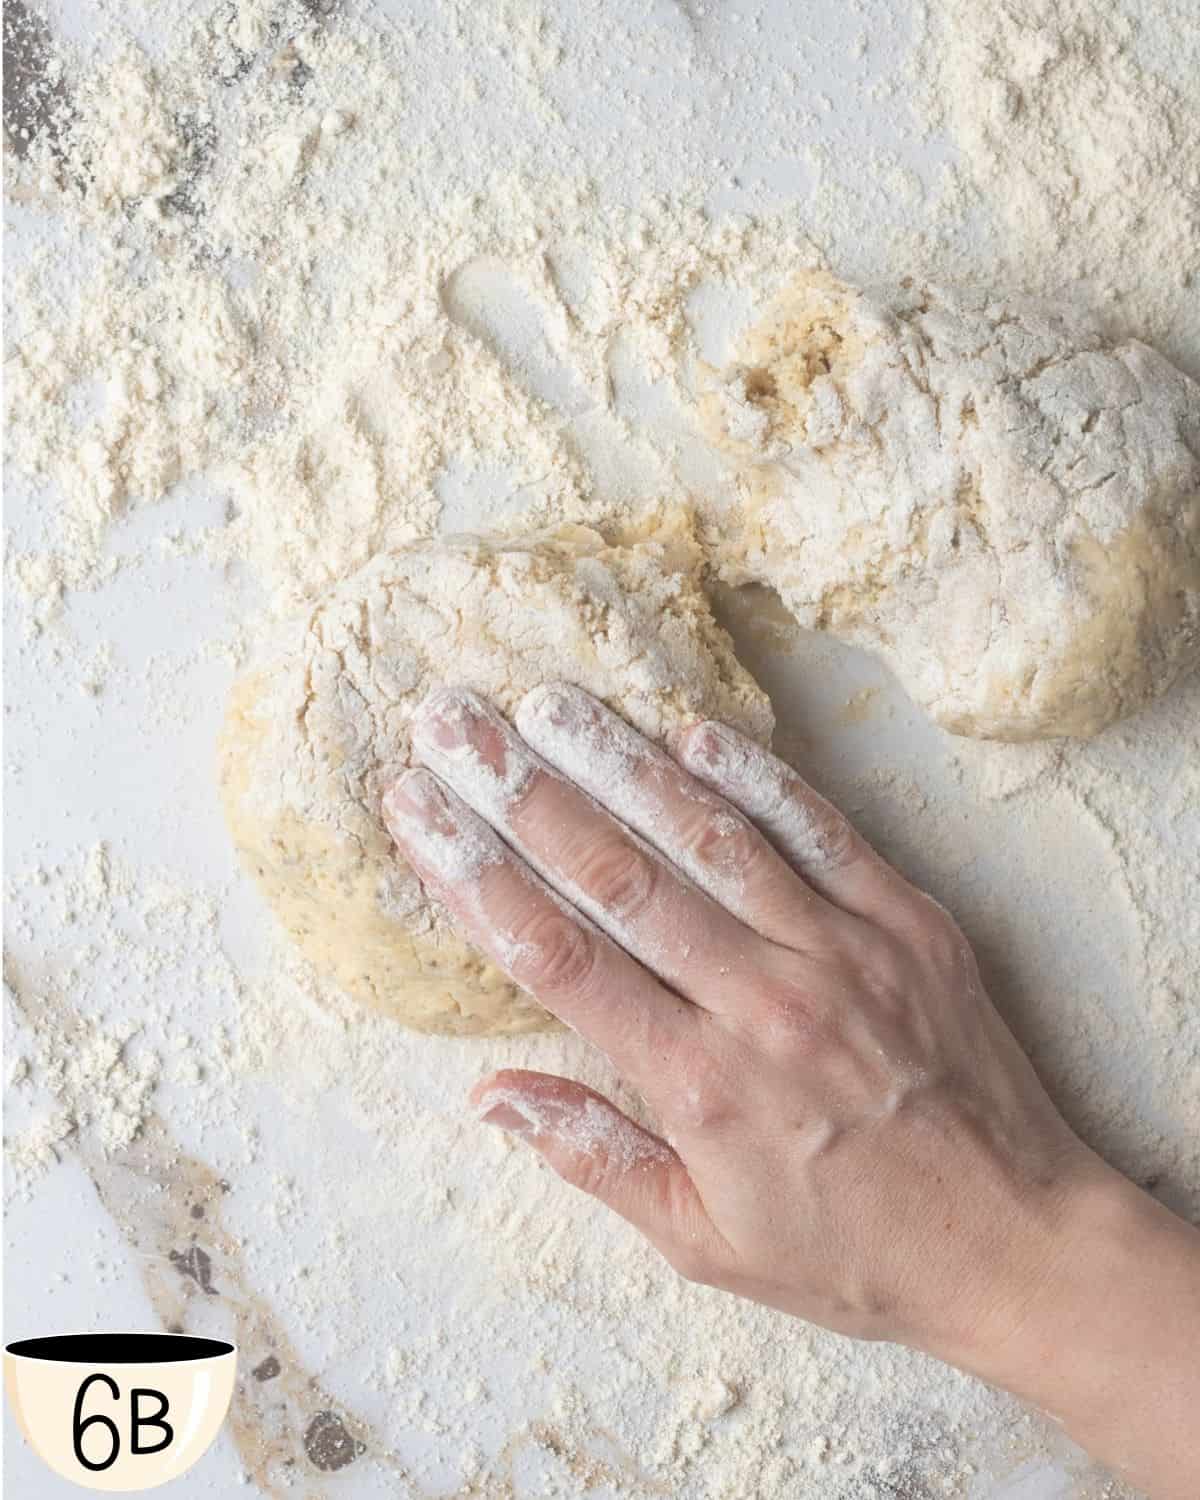
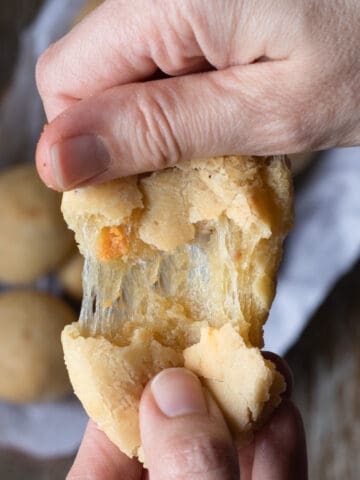
- Gluten-Free Flour: If you don’t have Bob’s Red Mill Gluten-Free All-Purpose Flour, look for a high-quality gluten-free flour blend with similar ingredients. Then, be mindful of the moisture level in the dough, each blend will behave differently and absorb more or less liquid. Check the image in Step 6 for what to look for in your gluten-free bagel dough.
- Chia Seeds: round flaxseeds are an excellent substitute for making a gel-like binder. Use the same ratio to maintain the integrity of these free vegan bagels.
- Sweeteners: Maple syrup, brown sugar, or coconut sugar can be swapped for sugar.
- Toppings: Feel free to switch up toppings based on what's in your pantry. Everything bagel seasoning, poppy seeds, or salt for a plain bagel is a great option.
👩🏽🍳Step-By-Step Instructions
Step 1: Activate The Yeast
In a small bowl, mix the instant yeast with warm water and sugar. Wait for it to froth, indicating it's active.
Chef Tip: I like to activate my yeast separately to ensure it is alive, rather than waiting for flat bagels to find out!
Step 2: Prepare the Chia Egg
In a separate bowl, combine chia seeds with water and let sit for 5 minutes. The seeds will absorb the water and take on a gel-like consistency.

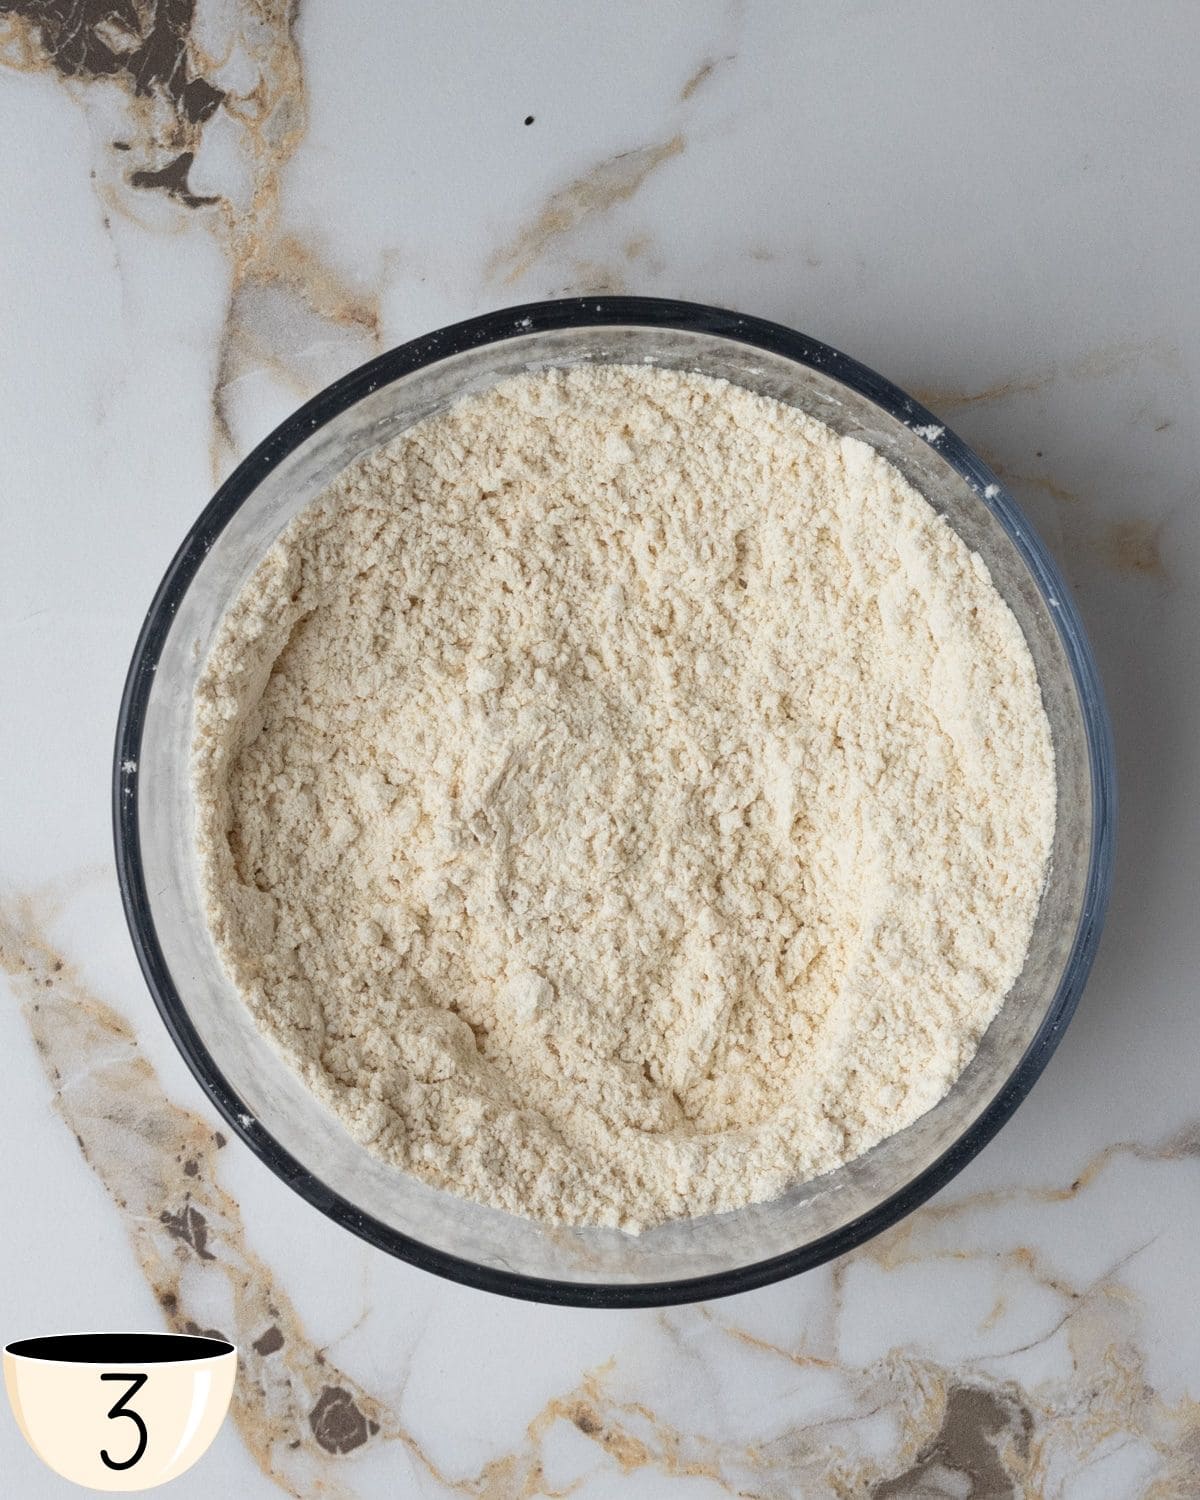
Step 3: Mix Dry Ingredients
In a large bowl, whisk together the gluten-free flour, baking powder, and salt.
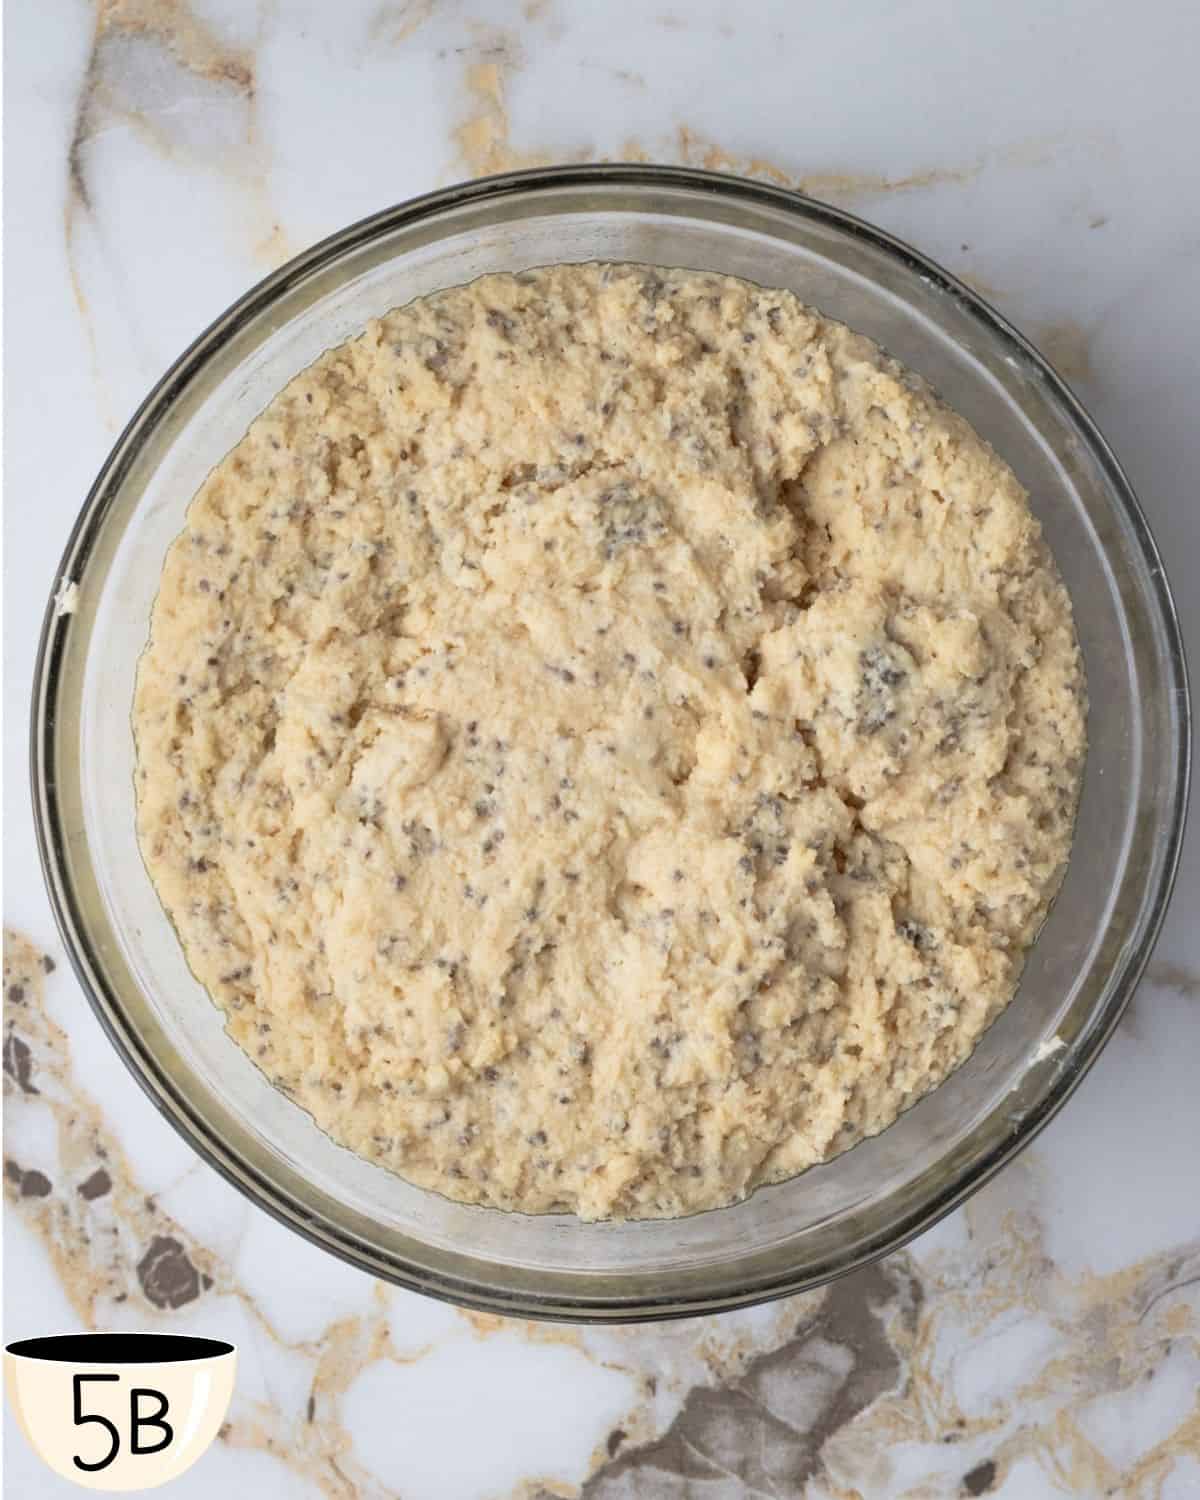
Step 4: Combine Wet and Dry Ingredients
Ensure the vegan yogurt is at room temperature. Then, combine the wet ingredients (yeast mixture, yogurt, and chia egg) with the dry ingredients. Using a spatula stir everything until a dough forms, roughly 3 minutes. The dough will be sticky and slightly wet (like very thick yogurt). Then transfer your dough to a clean oiled bowl. This will help allow the gluten-free dough to rise.


Step 5: Let the Bagel Dough Rise
Cover the dough with a clean towel and leave it in a warm place until it doubles in size. This will take 1-2 hours depending on the temperature in your kitchen.
Chef tip: Turn your oven on to 300°F and place your dough near the oven but NOT inside it.


Step 6: Knead the Dough
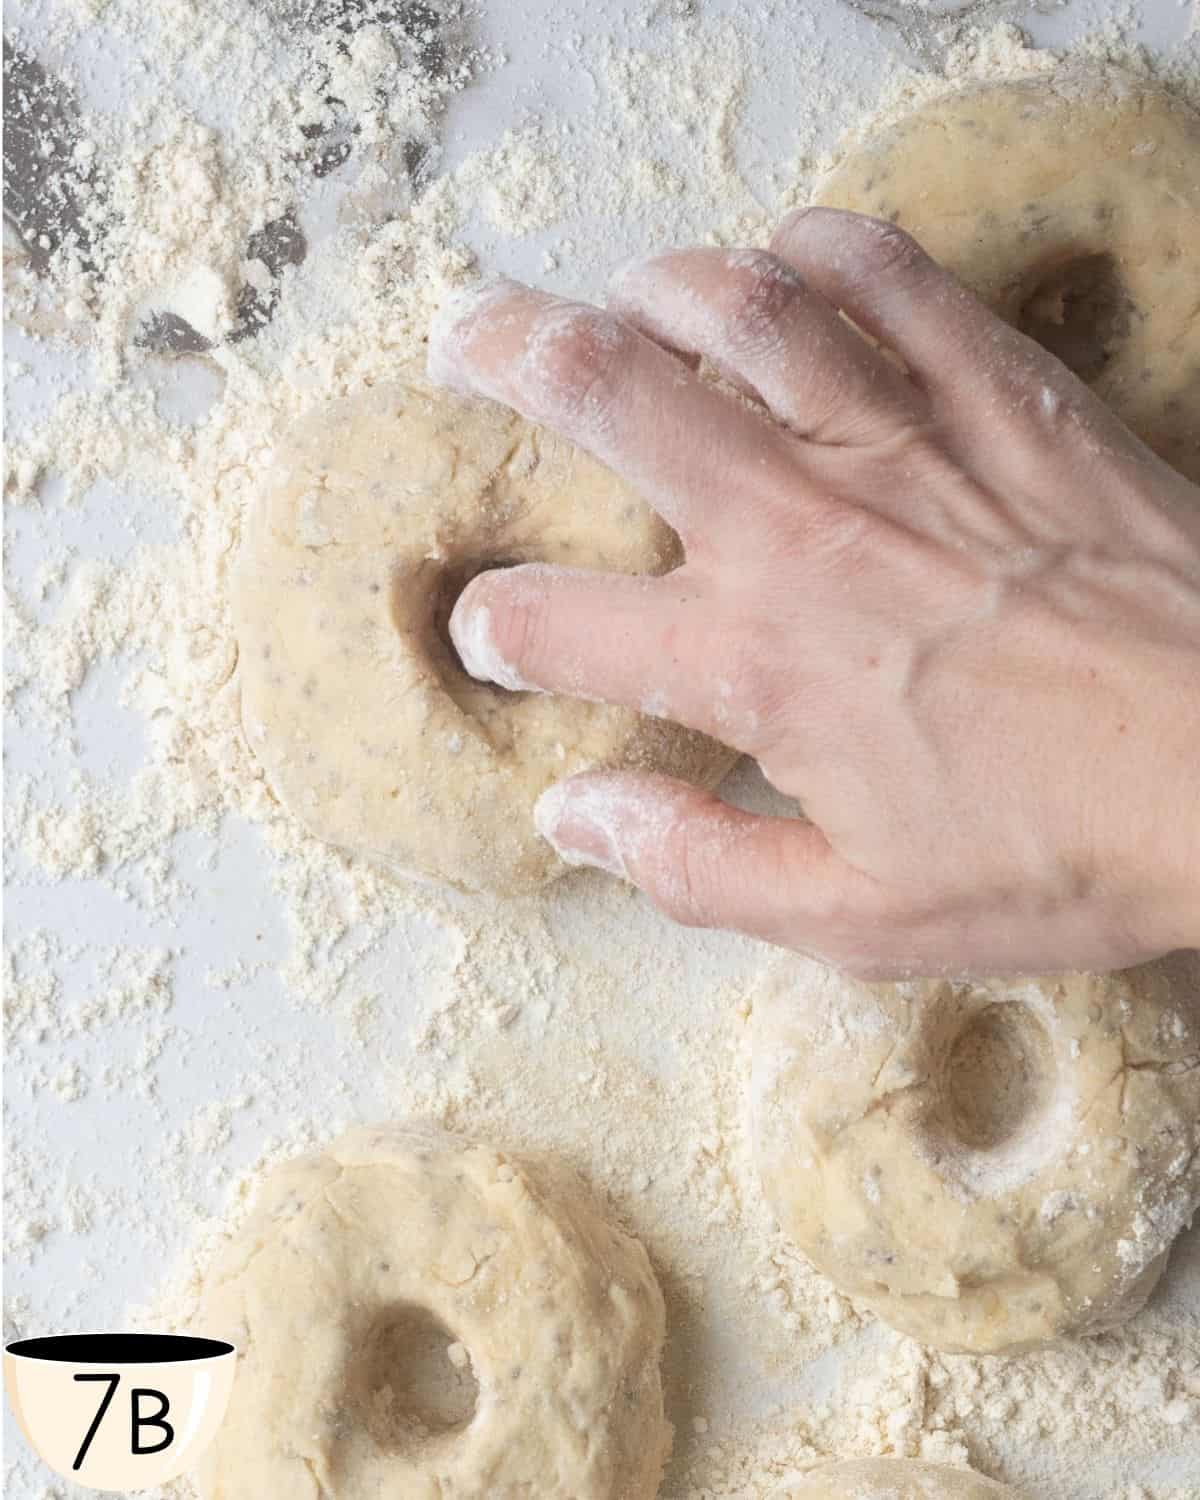
On a floured surface, knead the dough gently, aiming for a play-doh consistency (see image). If it's too sticky, add gluten-free flour 2 tablespoons at a time, careful not to add too much to avoid drying out the dough. Gluten-free dough will be sticker and slightly wetter than classic dough.
Chef Tip: Do not overwork the dough to ensure the best texture.

Step 7: Shape Your Gluten-Free Vegan Bagels
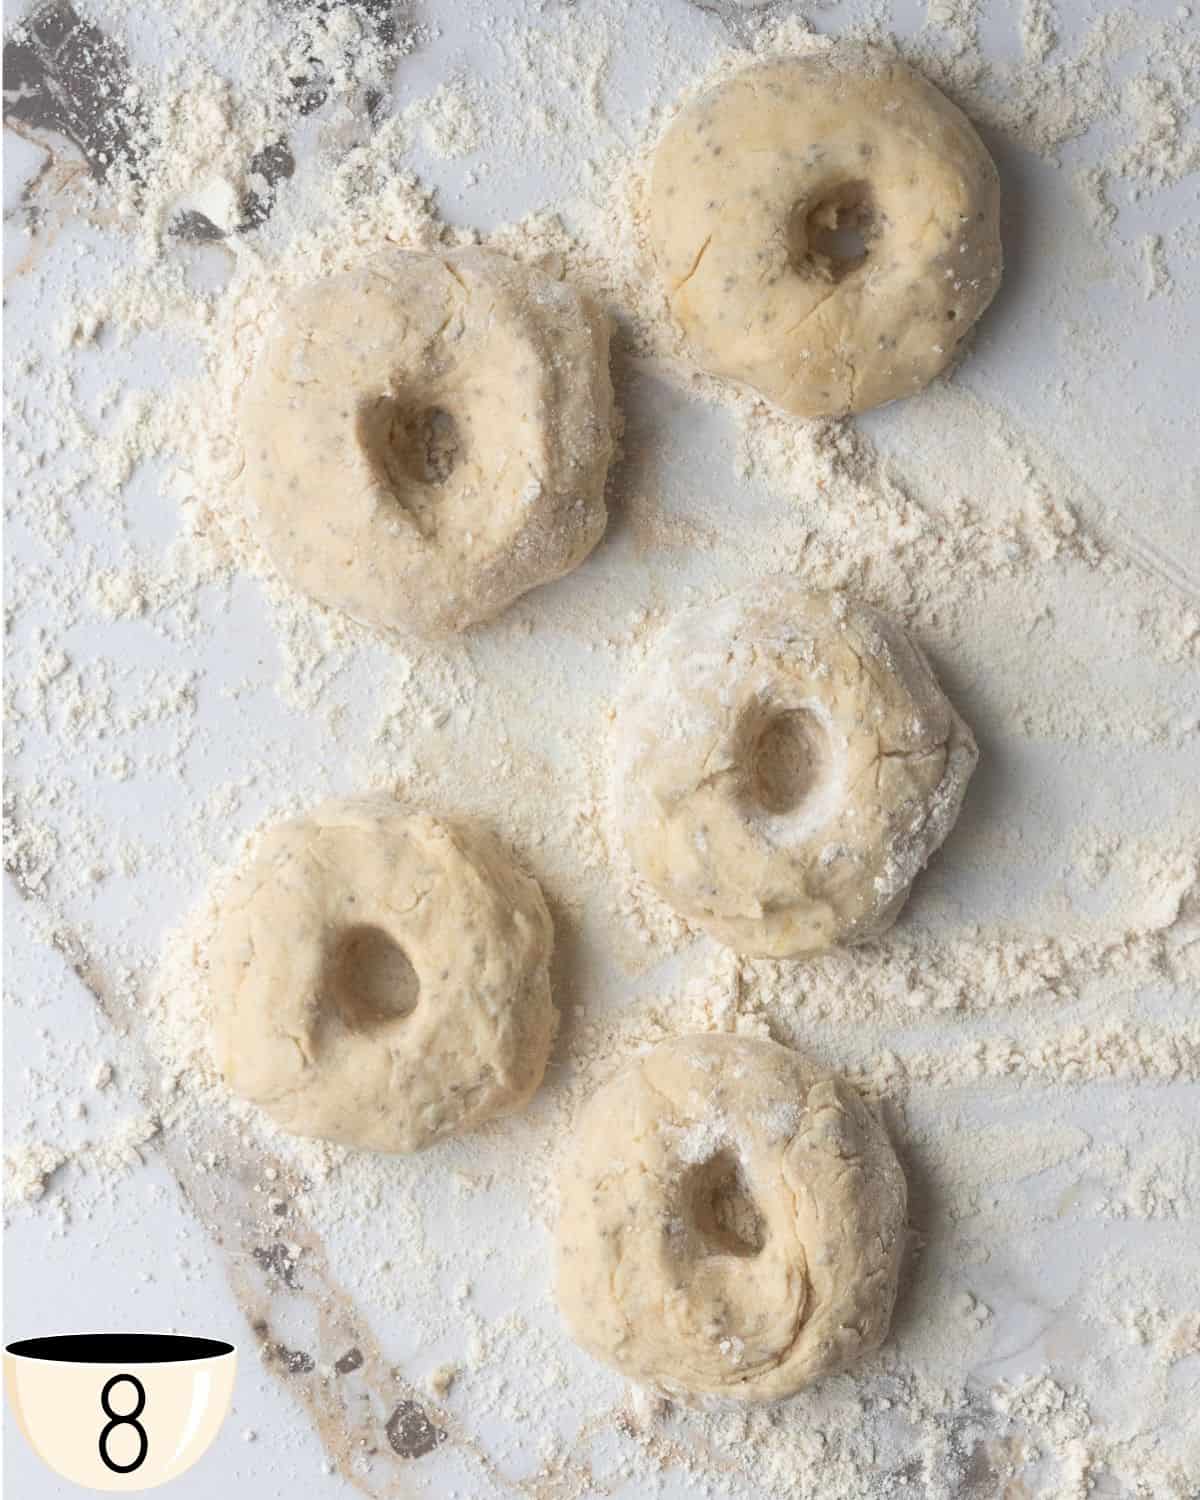
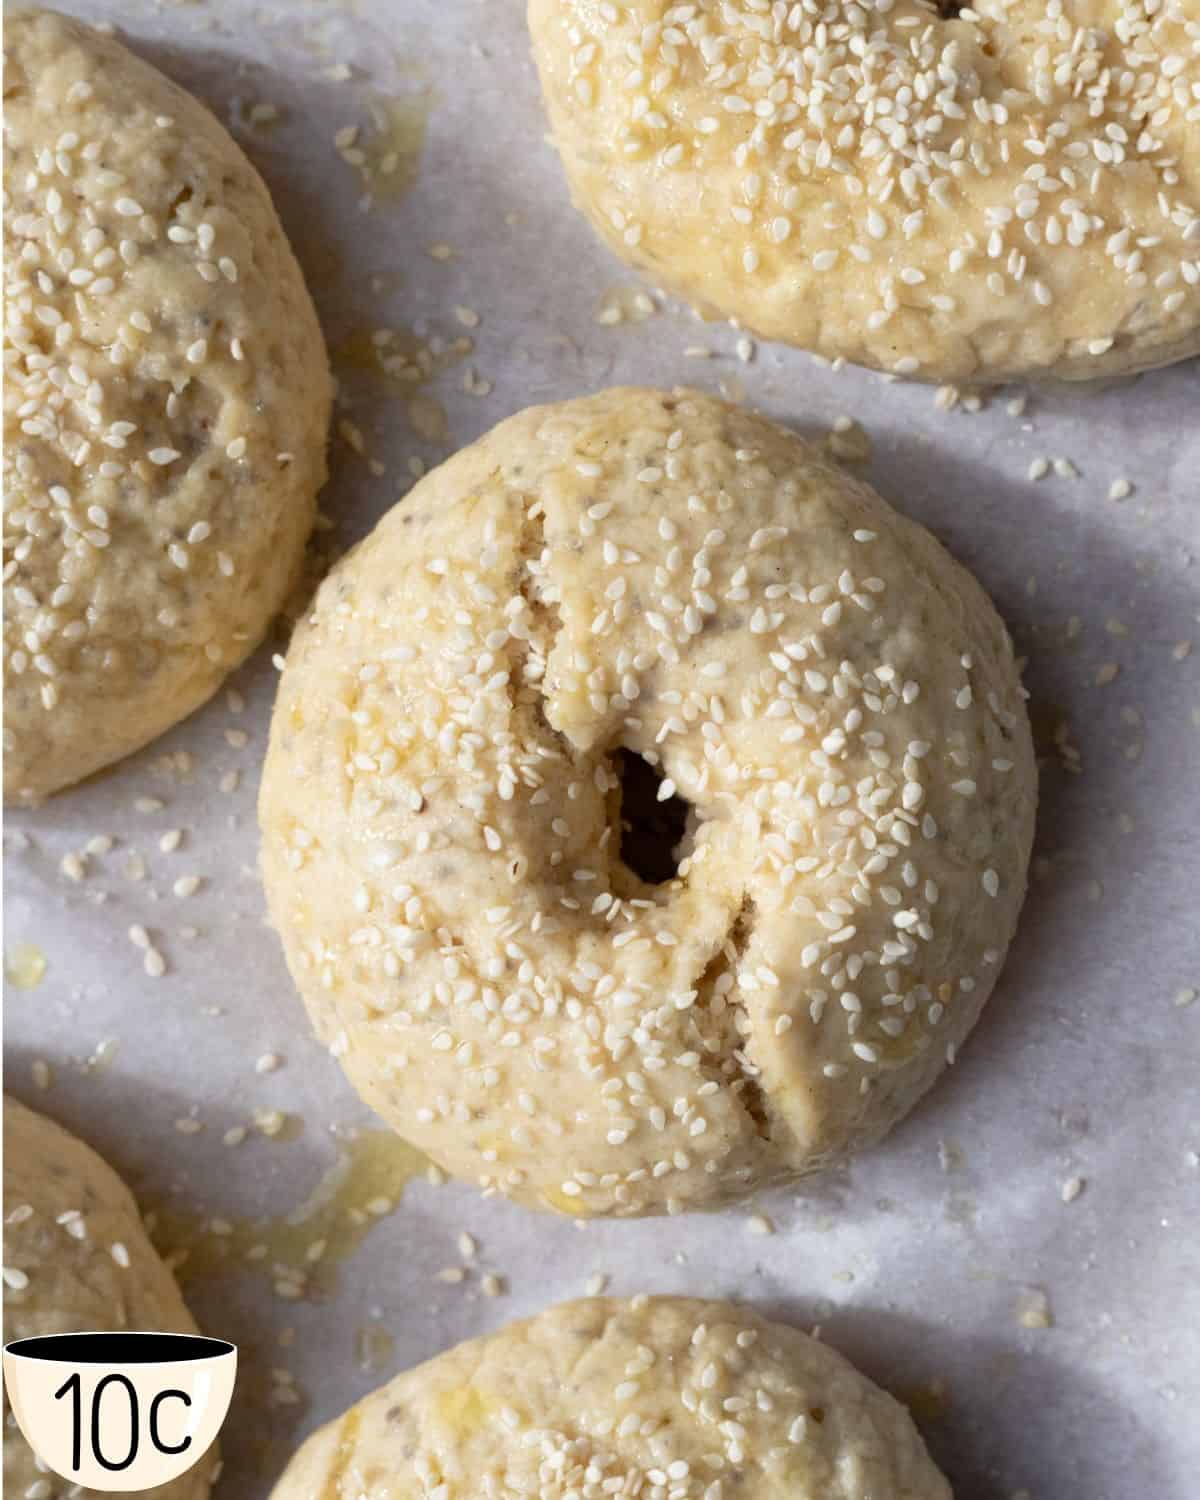
Next, divide the dough into 6 equal pieces. Flour your hands and roll each section into a ball. Place each ball onto the floured surface or parchment paper. Use your finger to create a ¾-inch wide hole in the center of each ball to form the iconic bagel shape.


Step 8: Prepare Boiling Water
Let your shaped bagels rest for 5 minutes. Meanwhile, preheat your oven to 375°F (190°C). Then bring a large pot of water to a boil and stir in the brown sugar.
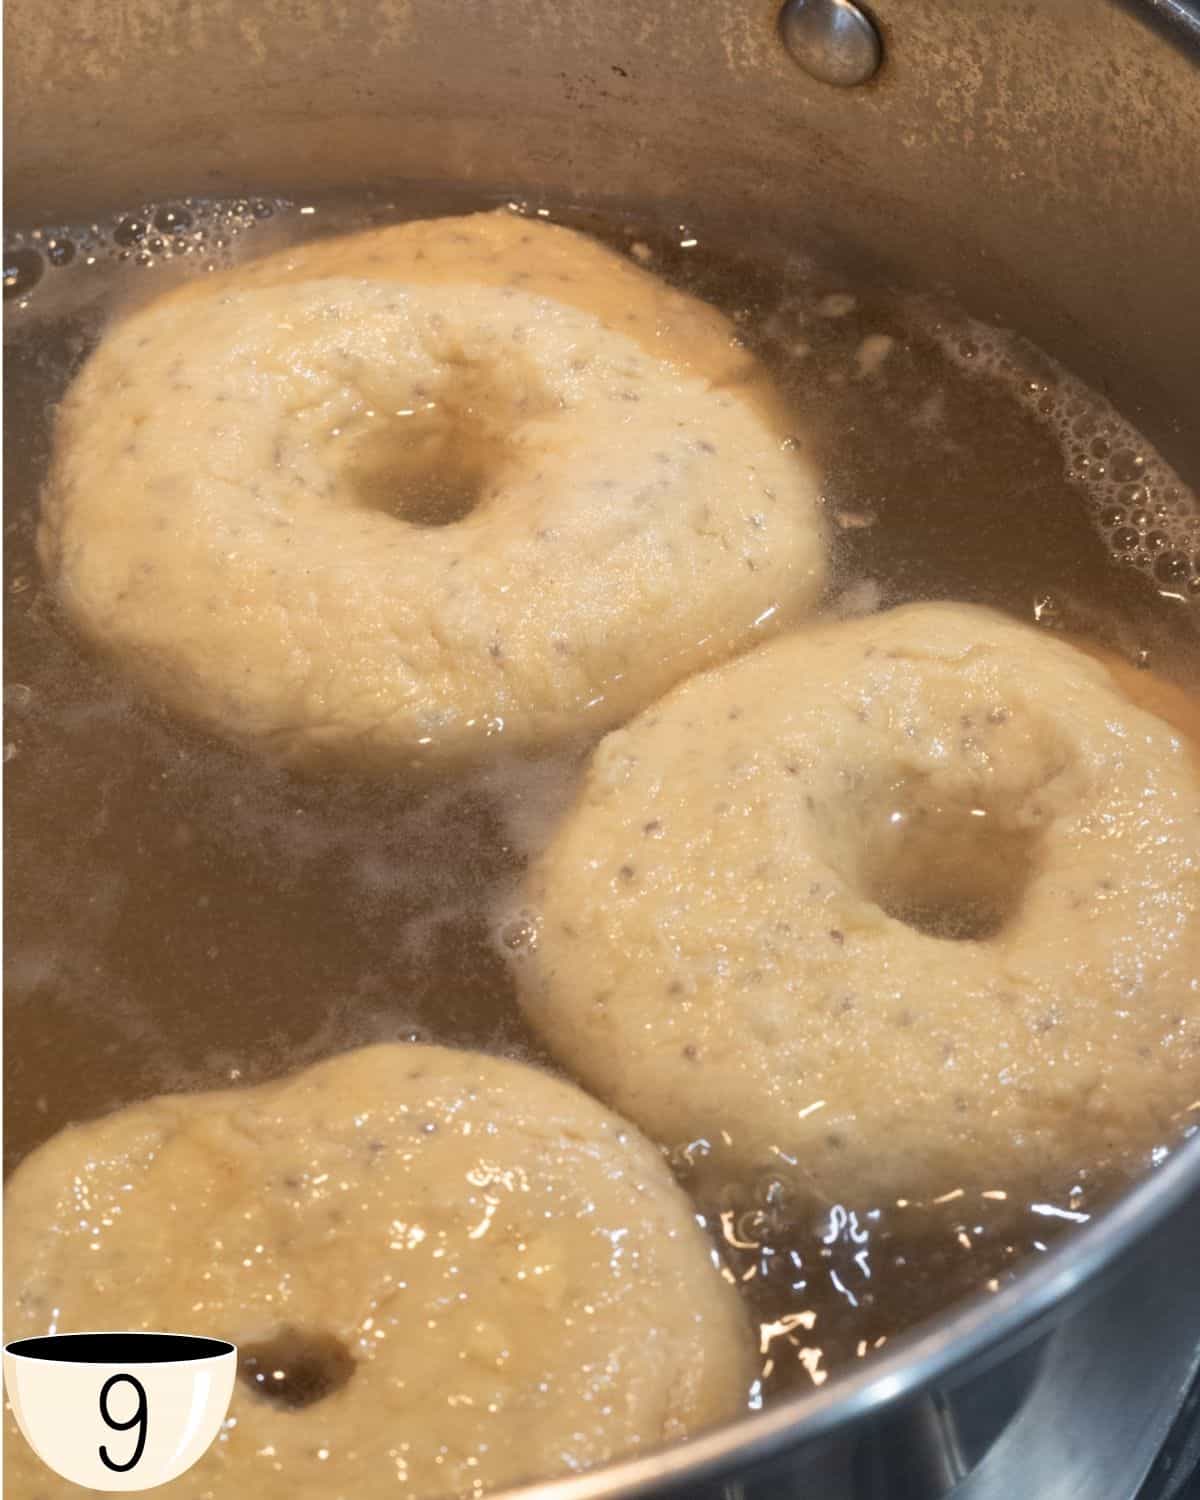
Step 9: Boil Bagels
Boil the bagels one or two at a time in the pot of boiling water, letting each one boil for about 30 seconds on each side. Use a slotted spoon to remove them from the water and place them onto a prepared baking sheet (greased) or parchment paper.
Chef tip: if your vegan bagel falls apart in the water, it is because you did not knead it enough. Before adding in any more,e re-roll them.
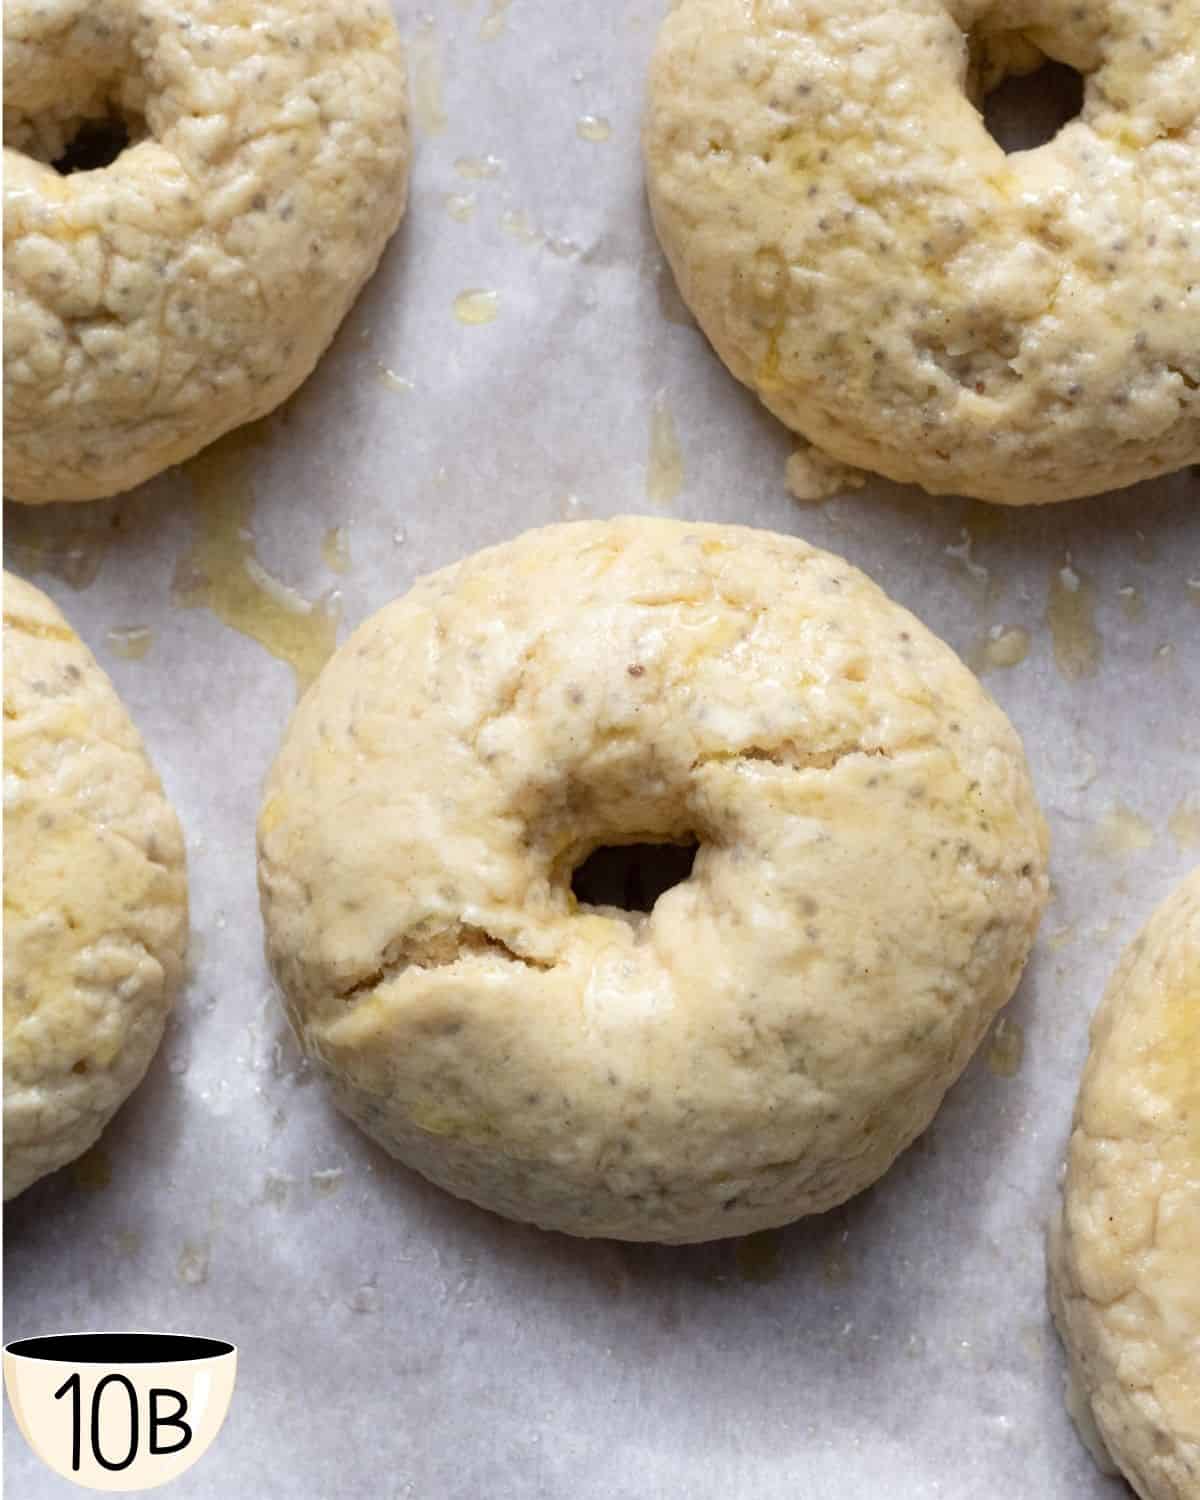
Step 10: Add Toppings
To a small bowl add in your oil olive and sprinkle in some salt. Then, brush each bagel with some of this mixture. While still wet, sprinkle each vegan gluten-free bagel with some additional salt and sesame seeds. This is your chance to customize each bagel to your liking.

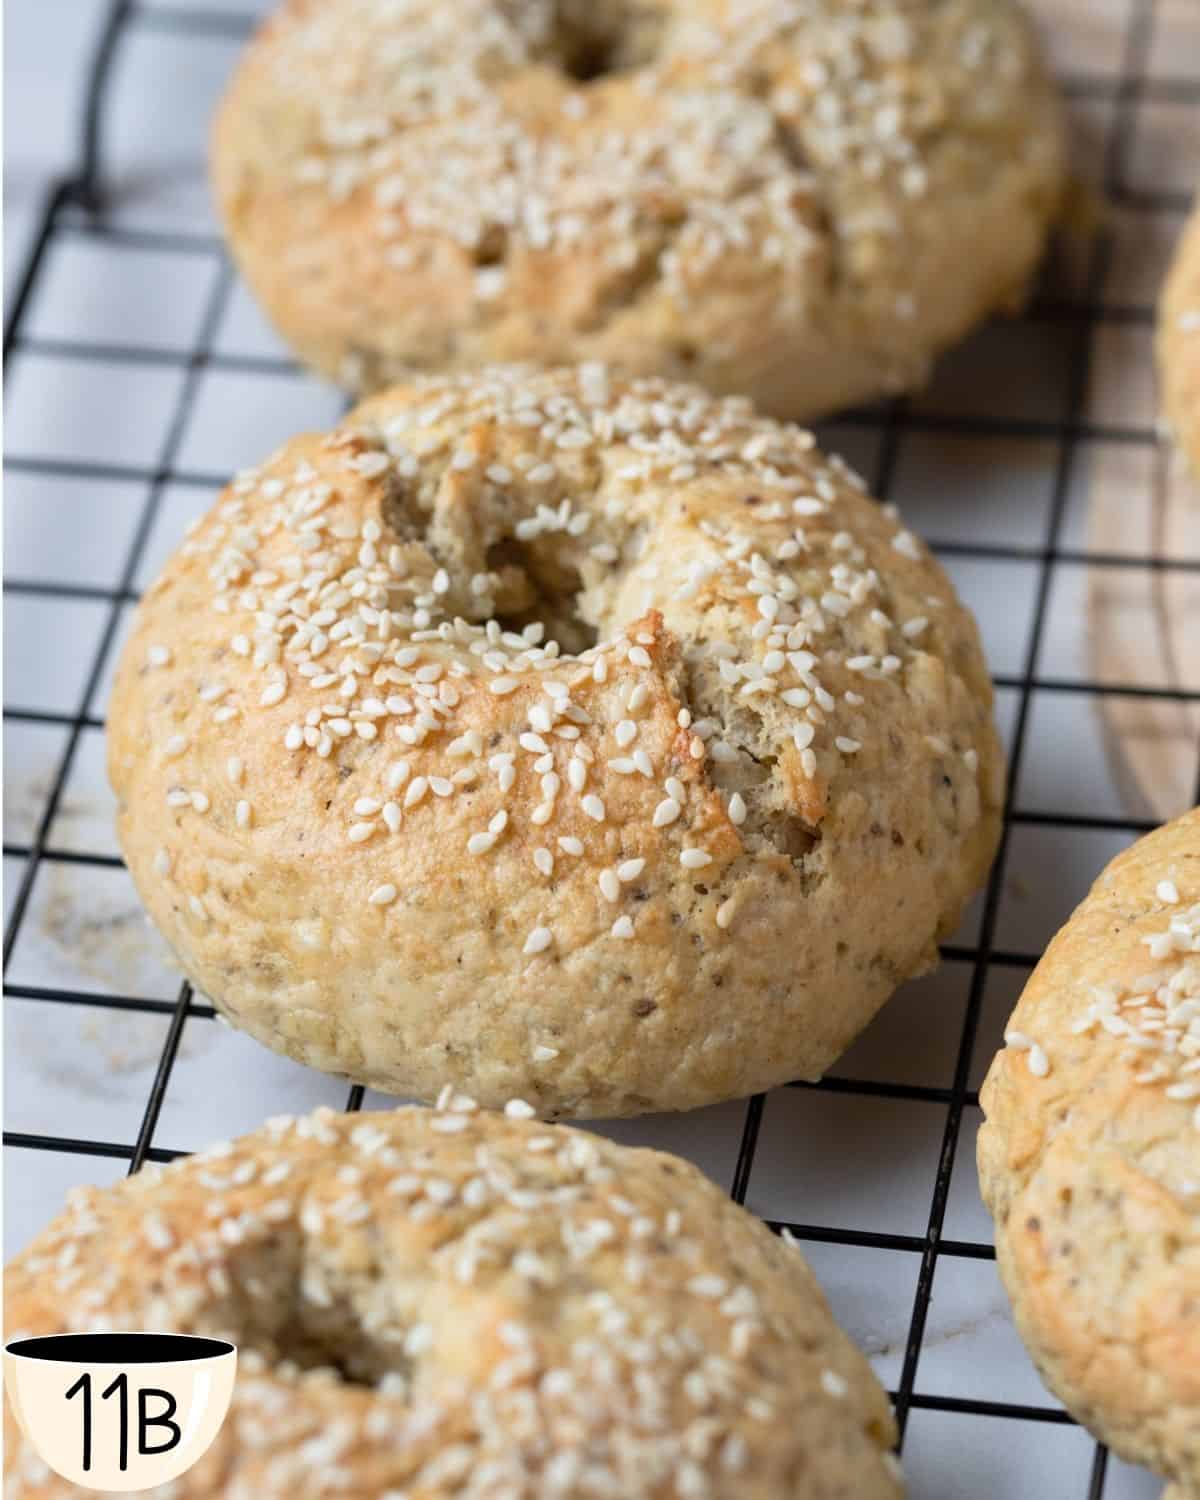
Step 11: Bake
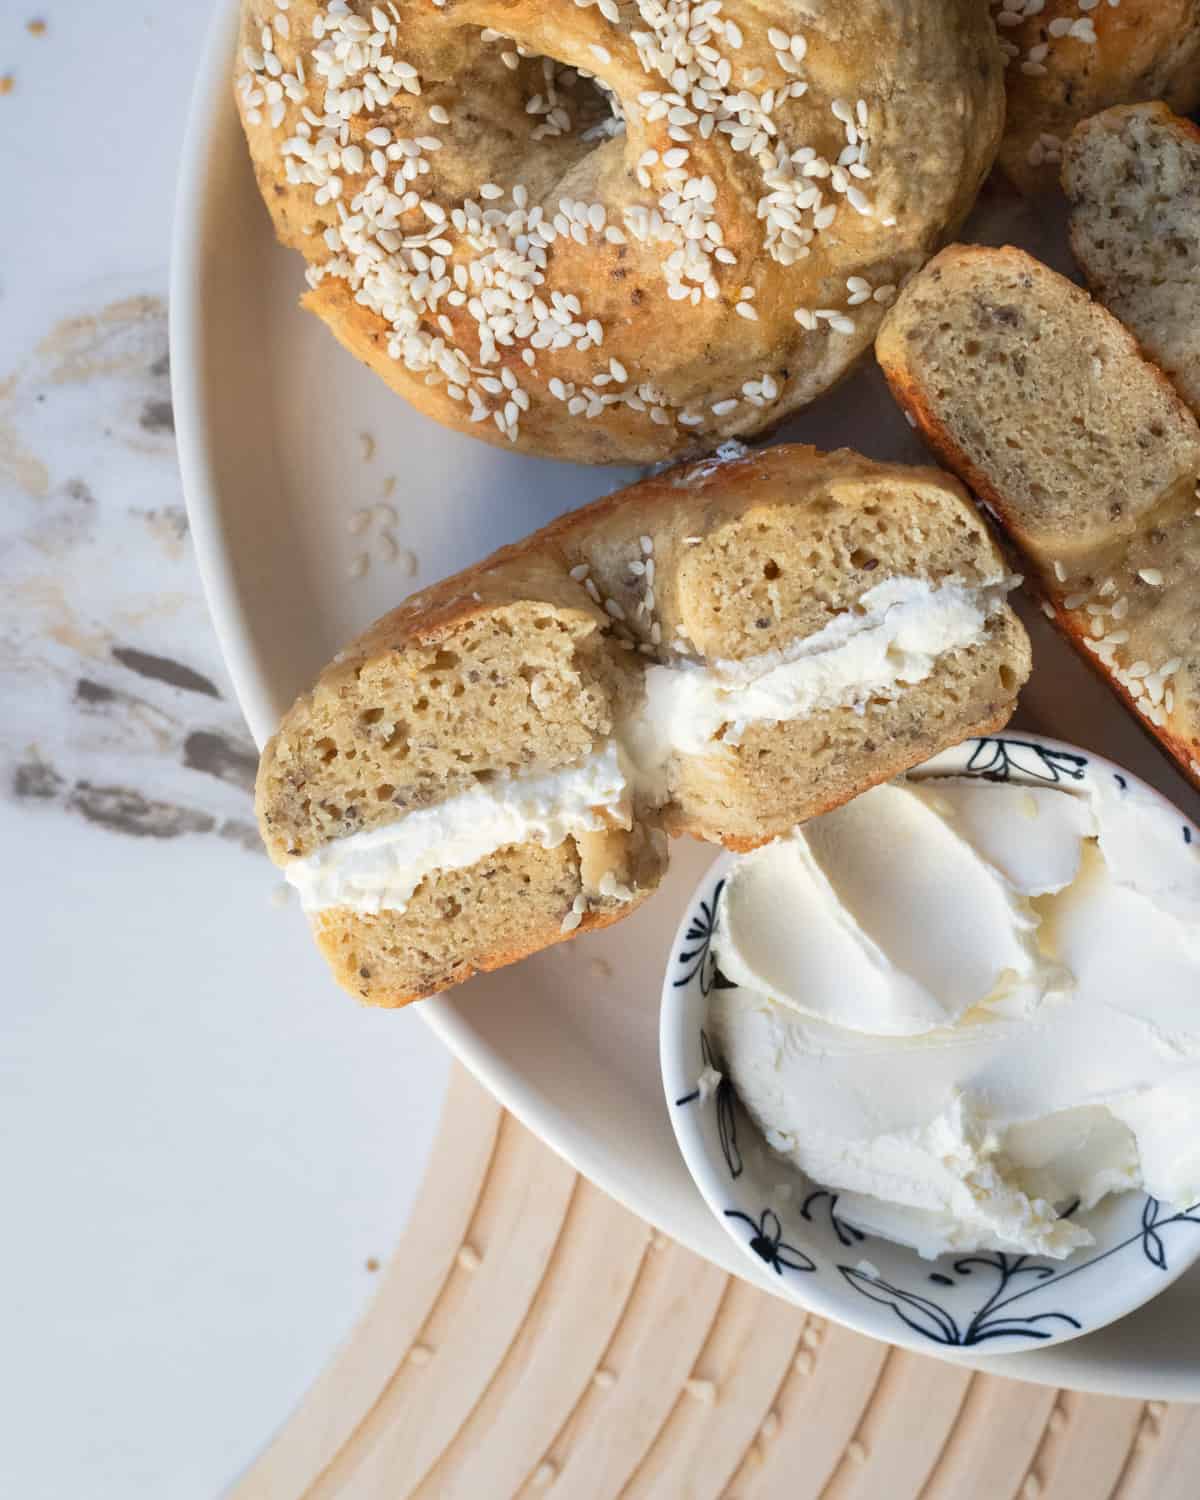
Bake for 20-25 minutes until golden brown. Then, let the bagel cool before serving. These vegan gluten-free bagels are best on the day they are baked. Enjoy your fresh bagels with some vegan butter or dairy-free cream cheese. For storage,e see the storage section.

✨Recipe Tips for Gluten-Free Vegan Bagels
Working with gluten-free dough can be tricky, but these tips will help you achieve perfect results every time:
Working with Gluten-Free Flour:
- Understand Your Flour Blend: Not all gluten-free flour blends are created equal. Bob's Red Mill AP Gluten-Free Flour is my go-to for this recipe because it absorbs moisture well and creates a chewy texture.
- Keep It Moist: Gluten-free dough tends to be drier than wheat dough. A slightly tackier texture is better, so don’t shy away from a wetter dough for the best results.
- Rest and Adjust: Always let your dough rest to allow the flours to hydrate fully. I can not stress this enough with gluten-free baking. After resting, adjust the liquid as needed—gluten-free flours absorb more liquid over time, so this step is key.
Kneading and Shaping Tips:
- Watch the Proof: Gluten-free doughs are more delicate. If the dough over-proofs, it can become too airy and fall apart during boiling.
- Expect a Stickier Dough: Gluten-free dough is stickeier than traditional wheat dough. Use floured hands to make shaping easier.
- Expect a Different Texture: Prepare for a dough that’s stickier and more like thick batter than traditional wheat dough. It won’t stretch or behave the same way because it lacks gluten.
Boiling and Baking Tips:
- Gentle Boiling: Boil your bagels gently to keep them intact. If they start breaking apart, the dough might have over-proofed or been overworked.
- Patience with Baking: Bake your bagels until they’re golden brown, or check with a thermometer to ensure they’ve reached 190°F to 210°F (88°C to 99°C). This guarantees a perfect crust and chewy interior.
⏲️ Meal-Prep and Make-Ahead Tips
Good news—our gluten-free vegan bagels are great for prepping ahead!
- Make the Dough Ahead of Time: Mix up the dough the night before, cover it with plastic wrap, and pop it in the fridge. When you're ready to bake, just let it come to room temperature before shaping and boiling.
- Freeze for Later: Mix up the dough the night before, cover it with plastic wrap, and pop it in the fridge. When you're ready to bake, just let it come to room temperature before shaping and boiling.
- Quick Reheat: Whether you’ve stored them in the fridge or freezer, just toast your bagels for a warm, fresh-from-the-oven feel. Perfect for those busy mornings!
🍴Bagel Recipe Toppings and Variations
- Veggie Tofu Sandwich: Add our crispy tofu nuggets smothered in our smokey eggplant dip with thinly sliced cucumbers, red onions, tomatoes, and radishes. The ultimate veggie sandwich!
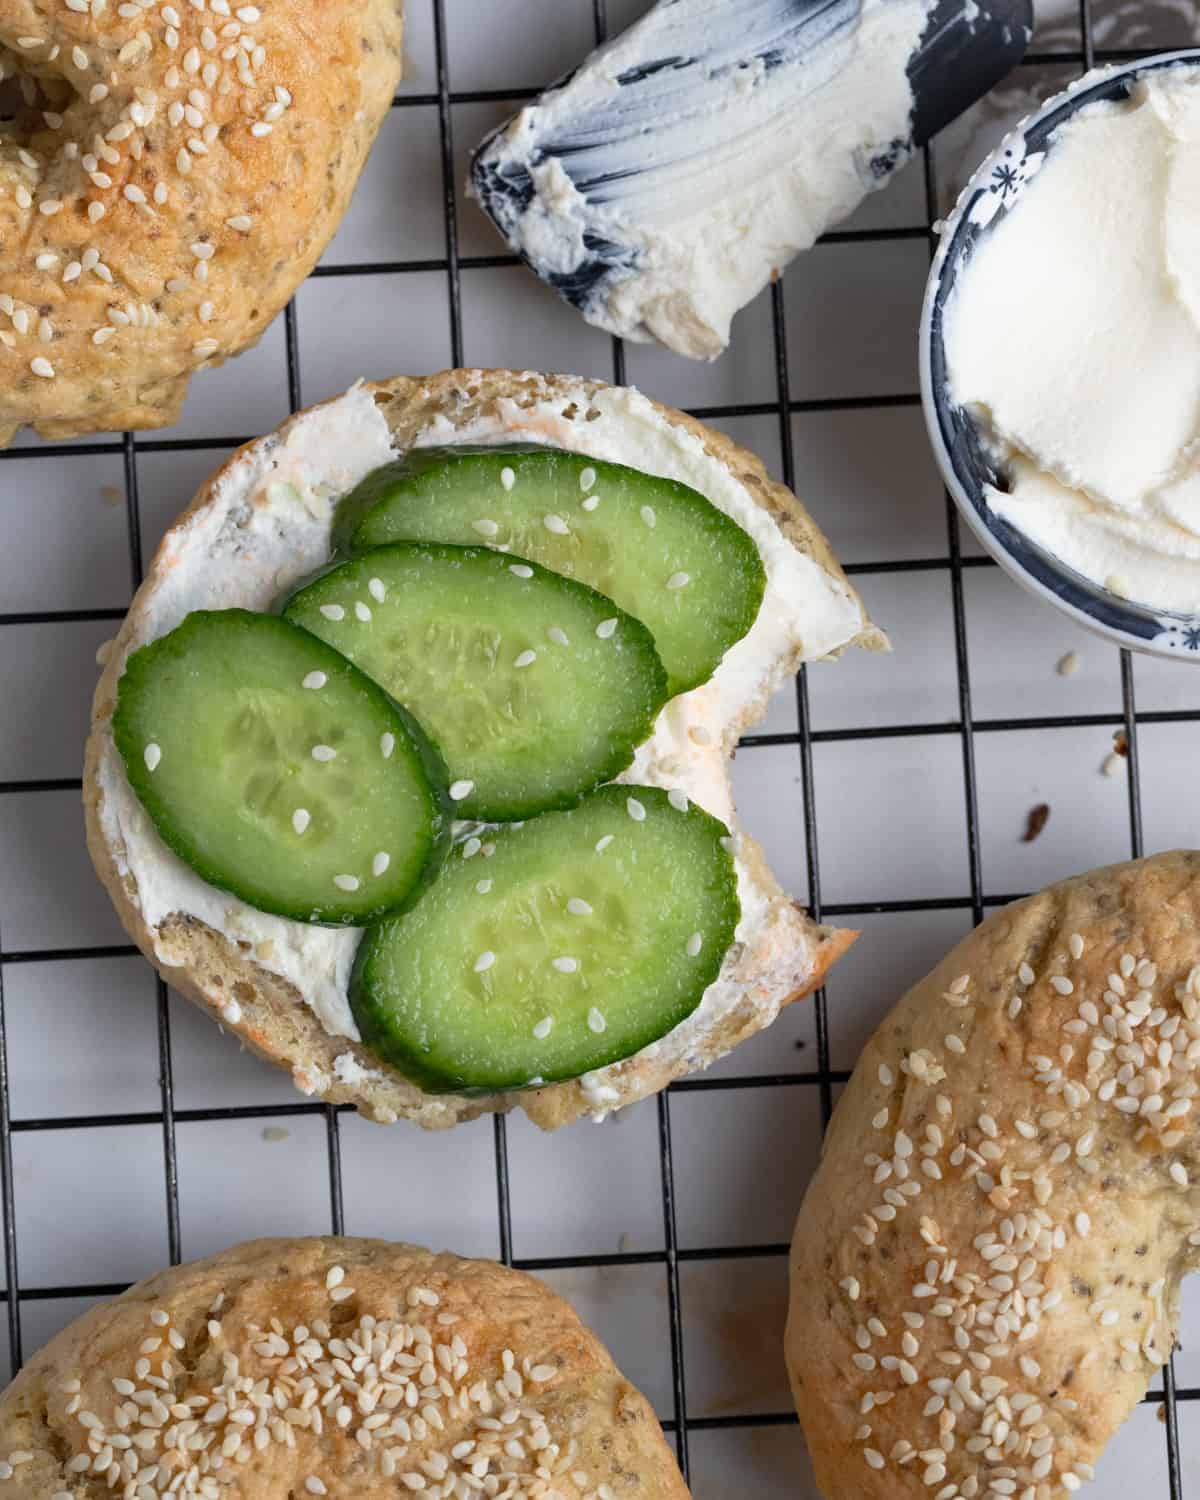
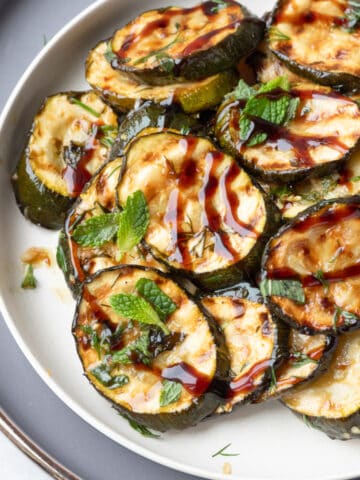
- Zucchini Antipasti Bagel: One of my personal favorite ways to enjoy this recipe is with some vegan cream cheese or our tofu ricotta topped with our balsamic roasted zucchini; it's so good!!
- Bagel Pizzas: Leftover gluten-free vegan bagels can be turned into mini pizzas for a quick snack or meal. Simple top each bagel with tomato sauce and vegan mozzarella cheese. Toast until bubbly and golden brown.
- Flavor Twists: Mix in cinnamon and raisins for a sweet version, or garlic and onion powder for a savory snack. Tailor these homemade gluten-free bagels to whatever you have on hand.


🥡Storage
Storing your vegan gluten-free bagels is simple. For short-term storage, keep them in an airtight container or zip-lock bag in the fridge, where they’ll stay fresh for up to 5 days. I like to slice them before storing them—it makes toasting quicker and easier.
- Freezer: Freeze the cooled gluten-free vegan bagels in an airtight container for up to 3 months. Whether you thaw them overnight in the fridge or toast them straight from frozen, you’ll have fresh-tasting bagels ready when you need them.
- Reheating: Toast the bagels until they’re warm and golden. If they’re frozen, a quick 15-second zap in the microwave can soften them up enough to toast perfectly.

As a busy mom of three with years of experience creating gluten-free and dairy-free recipes, I know how challenging it can be to replicate the texture and flavor of classic favorites like bagels. Combining my background as a health scientist with my passion for food, I’ve worked to perfect recipes that satisfy both dietary needs and taste buds. These vegan gluten-free bagels are chewy, flavorful, and just as good as their wheat-based counterparts—perfect for family breakfasts or meal prep!
❔Recipe FAQ
Gluten-free vegan dough relies heavily on the leavening agents (like baking powder and yeast) and how well they're activated. Ensure your leavening agents are fresh and that you're giving the dough the right conditions to rise. Additionally, overmixing can deflate the dough, so mix until just combined.
This often results from not enough moisture or mixing the dough too much. Gluten-free vegan flours absorb more liquid than wheat flour, so ensure you’re adding enough water or non-dairy milk as per the recipe. Also, gently mix the dough to keep air incorporated.
Gluten-free dough is naturally stickier than traditional dough. Add 2 tablespoon of flour at a time if it's too sticky to handle. You can also chill the dough for 30 minutes to make it easier to work with. Wetting your hands with water or oil before shaping can also prevent sticking. Remember, it won't feel like wheat dough and won't be perfectly smooth.
Bagels can fall apart during boiling if the dough isn’t kneaded enough or over-proofed. Gluten-free doughs are delicate, so it’s important to ensure the dough is properly hydrated and rested before boiling. Also, handle the bagels gently when transferring them to the water, and make sure the water is at a gentle boil—not too vigorous, which can break apart the dough.
🌟 Loved our gluten-free vegan bagels? Let us know! I’d be thrilled if you could leave a comment, star rating, or share this recipe. Your feedback helps support and improve AtMyTable and helps others discover new favorites. Or come chat with me on Facebook or Instagram!
🥣More Easy Gluten-Free Baking


👋🏼Até logo, amigos! Keep savoring every bite of our gluten-free vegan bagels, and don’t forget—life’s better with a little flavor and fun. Até a próxima!
📖 Recipe

Easy Vegan & Gluten-Free Bagels: Perfect Every Time
Ingredients
- 2 cups all-purpose gluten-free flour mix Bob's Red Mill Recommended
- 8 grams instant yeast
- ¼ cup warm water
- 1 cup vegan Greek yogurt, plain (Riveria recommended)
- 2 tablespoon chia seeds mixed with 4 tablespoon water
- 1 tablespoon sugar
- 2 teaspoon baking powder
- 1 teaspoon salt
To boil bagels
- pot of boiling water
- 1 tablespoon sugar
Bagel toppings
- ¼ cup sesame seeds
- 2 tablespoon olive oil
- ½ teaspoon salt
Instructions
- Mix the instant yeast with warm water and a pinch of sugar in a small bowl. Wait for it to froth, indicating it's active.8 grams instant yeast, ¼ cup warm water, 1 tablespoon sugar
- Combine chia seeds with water and let sit until gel-like, about 5 minutes.2 tablespoon chia seeds
- Whisk the gluten-free flour, baking powder, and salt in a large bowl.2 cups all-purpose gluten-free flour mix, 2 teaspoon baking powder, 1 teaspoon salt
- Ensure the vegan yogurt is at room temperature. Mix the activated yeast, yogurt, and chia egg with the dry ingredients. Then begin to mix until a sticky yet pliable dough forms. This should take 3ish minutes. Tip: The dough should have a playdoh consistency and will be sticky (see image)1 cup vegan Greek yogurt, plain
- Cover and let it rise in a warm spot until doubled in size, about 1-2 hours.
- On a floured surface, knead the dough gently, aiming for a play-doh consistency. It will be sticky yet pliable. If the dough is too sticky, add 2 tablespoon of flour as needed but avoid overworking.
- Divide the dough into 6 sections, then using floured hands roll each into a ball. Place onto the floured surface or parchment paper and then using your finger create a ¾ inch hole in the center of each.
- Let your shaped bagels rest for 5 minutes while you preheat the oven to 375°F (190°C) and bring a large pot of water to a boil with the sugar.pot of boiling water, 1 tablespoon sugar
- Boil each bagel for about 30 seconds per side. Remove with a slotted spoon and then place on a greased baking pan or parchment-lined baking sheet.
- Mix olive oil and salt, brush on bagels, and add any desired toppings.2 tablespoon olive oil , ½ teaspoon salt, ¼ cup sesame seeds
- Bake at 375°F (190°C) for 20-25 minutes until golden brown.
Notes
- Rest the dough: Gluten-free flour needs time to hydrate fully for the best texture.
- Sticky dough is okay: Gluten-free dough should feel like thick batter; avoid adding too much extra flour.
- Gentle boiling: Prevent bagels from falling apart by boiling gently for 30 seconds on each side.
- Golden-brown bake: Ensure bagels reach 190–210°F for the perfect crust and chewy interior.


Morticia says
These look delicious! We have family with lots of food allergies (eggs, dairy, peanut, sesame, chia) and a few more with celiac disease...do you know of a sub that would work for the chia seeds?
Thanks!
Patricia Granek says
Hey Morticia, my recommendation woudl be to try using flax seed or an egg replacer (I like the Bob's Red Mill one). That might do the trick! If you do sub with flax I woudl love to hear how it turned out!
Cary says
This was so delicious and chewy! I have missed bagels--but now I can have them. The dough was a bit too sticky to handle so I did refrigerate it first which helped. I bet this dough would also be great as a pizza crust.
Patricia Granek says
Hey Cary! Thank you so much for your lovely comment! I am so glad you liked them as much as we do! I love your tip about refrigerating them, thank you for sharing I will add this in to help others :0) I haven't treid this recipe as a pizza crust but I bet it would be a good start! A great pizza dough is something we plan to post soon!
Cindy says
I highly recommend this recipe. My bagels turn out amazing. I used garlic powder in my last batch they were great! Letting things sit and rest does make a difference.
Patricia Granek says
Yes resting it is KEY! So gald you like this recipe. Its one of my favs too 🙂